As of Servebolt Optimizer v2, you can automatically purge the HTML Cloudflare edge cache on post, page, product and custom post type updates. You can also purge the cache completely with a manual action from within the WordPress admin.
Before starting the steps to enable Cloudflare cache purging, install and enable the Servebolt Optimizer plugin in your WordPress.
Steps to set up automatic Cloudflare cache purging
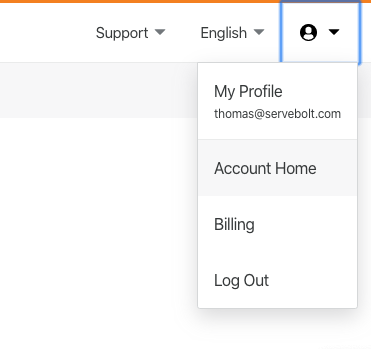
- Log in to your Cloudflare dashboard, and find your account menu in the top right. Navigate to “My profile”
- Navigate to the “API Tokens” tab

- Click “Create Token”
API tokens are similar to API keys, but you can limit the capabilities the API tokens can have. Your API keys have full access to everything, always.
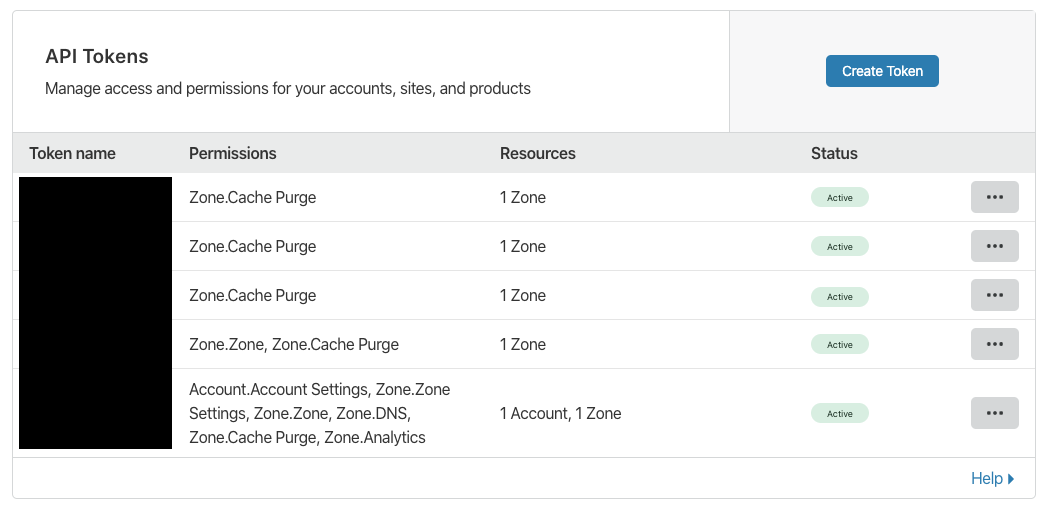
- Click “Create Token”
API tokens are similar to API keys, but you can limit the capabilities the API tokens can have. Your API keys have full access to everything, always.
- Create a custom token
We want a very limited permission token and therefore need a custom token.
- . Configure your new token

The recommended configuration is the following:
Permissions
Zone -> Cache Purge -> Purge
Zone resources
Include -> Specific zone -> Select the zone you want to automatically purge
For the rest of the settings, leave them as-is. - Click “Continue to summary”
Click “Continue to summary” and in the next screen click “Create Token”
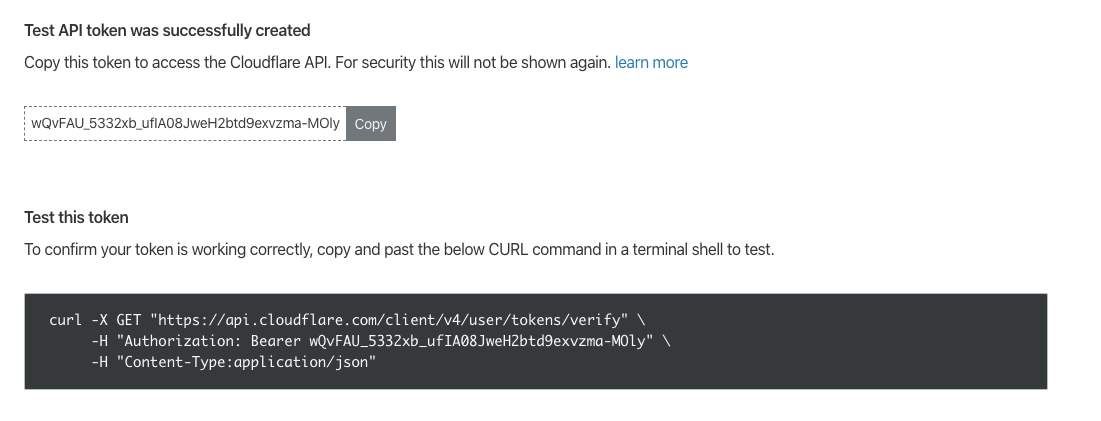
- Copy the API Token
You will now see the token. Copy it, and keep it in a secure location. You will need it in the next steps.
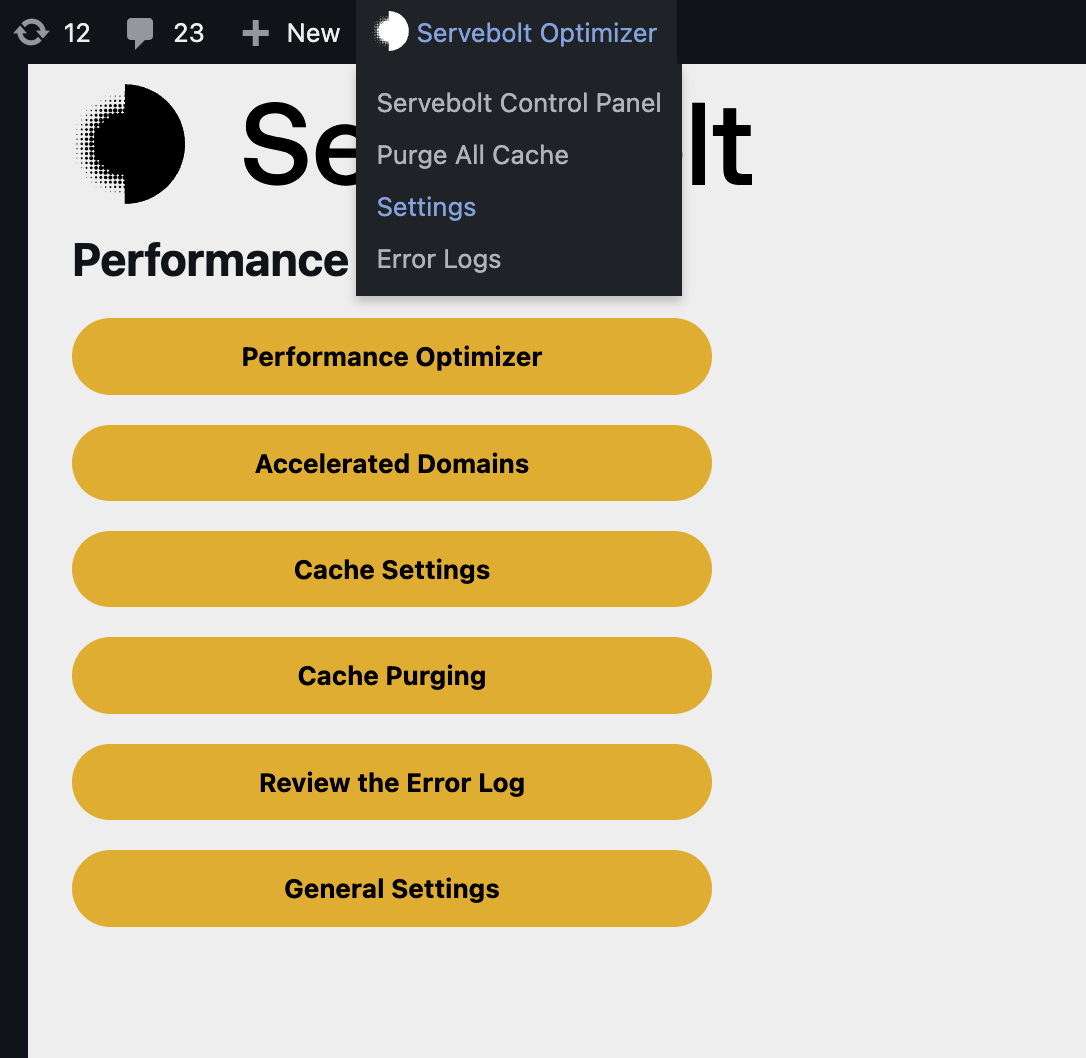
- Navigate to the Servebolt menu
Log in to your WordPress admin and navigate to the Servebolt Optimizer in the top panel. Click on Settings -> Cache Purging.
- Configure the plugin by selecting Cloudflare under Cache Provider:
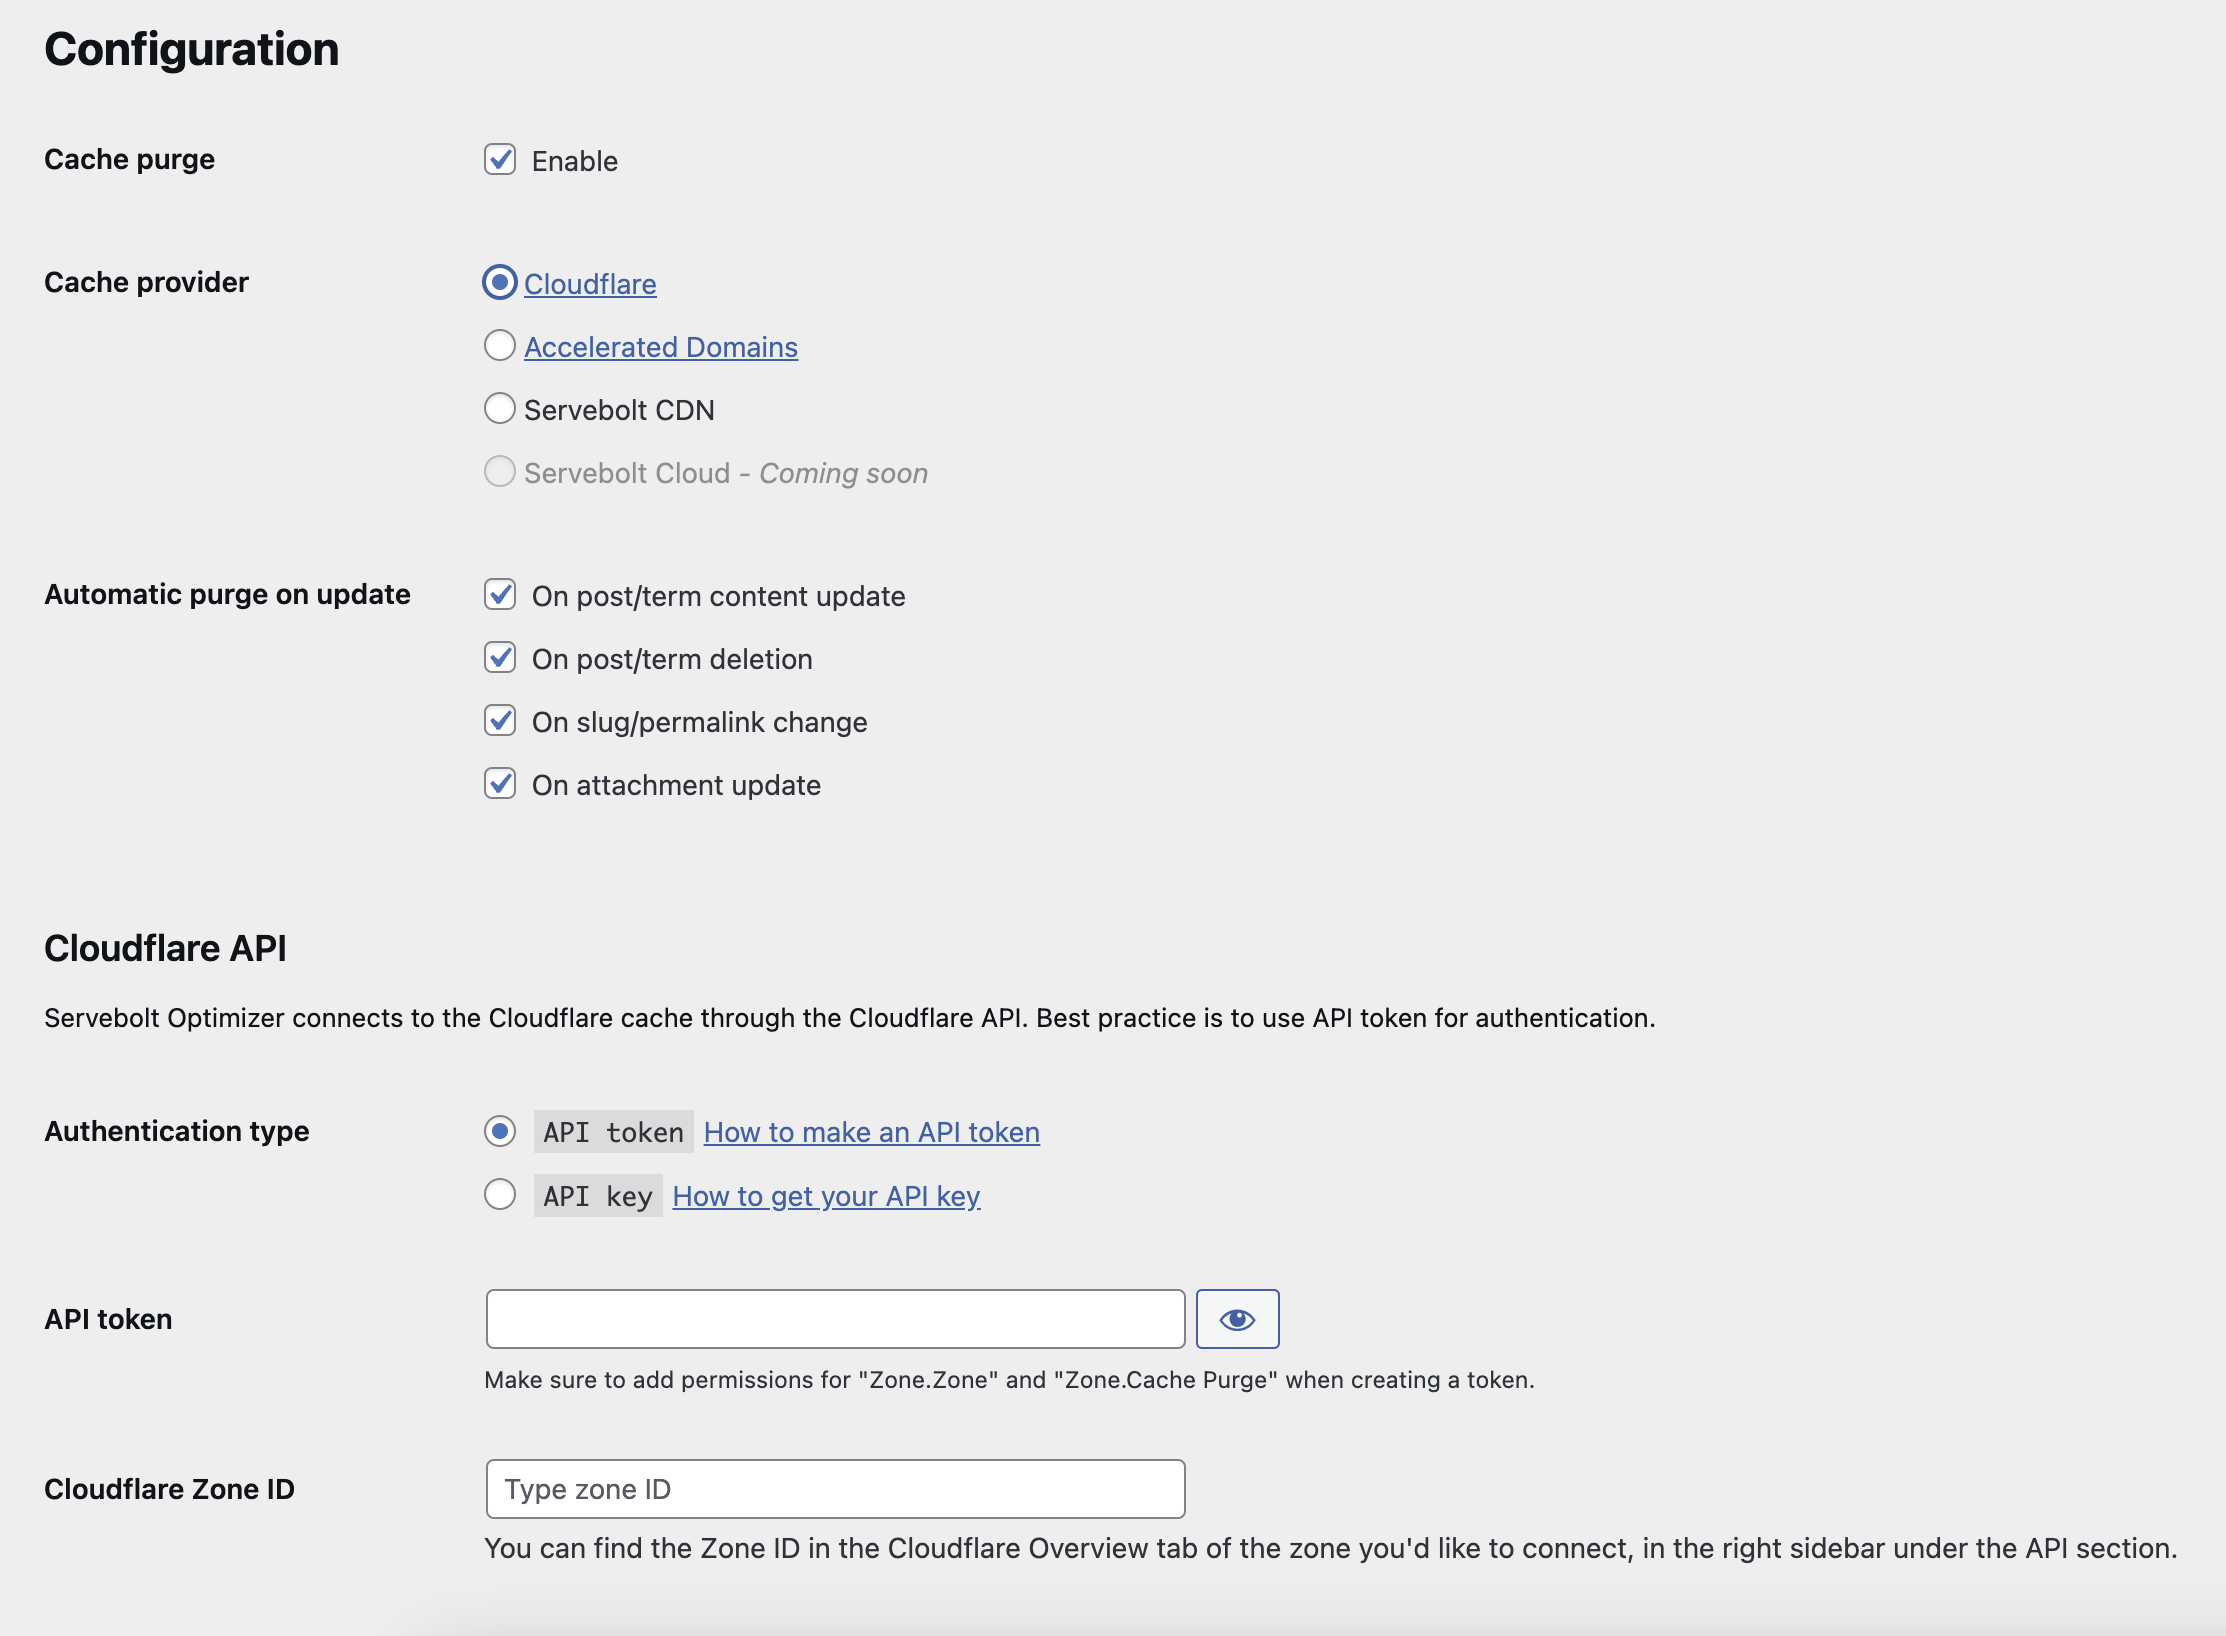
- Save API token
In the plugin, you have three important fields.
– Enabling the cache purging feature
– Setting the API token
– Setting the Zone ID
First, click the Enable checkbox. Then copy your API token, and paste it into the API token field. Make sure the authentication type is set to API Token and not API Key. Before saving these settings we also need the Zone ID. You can find this by navigating to the Cloudflare dashboard, and the zone in question.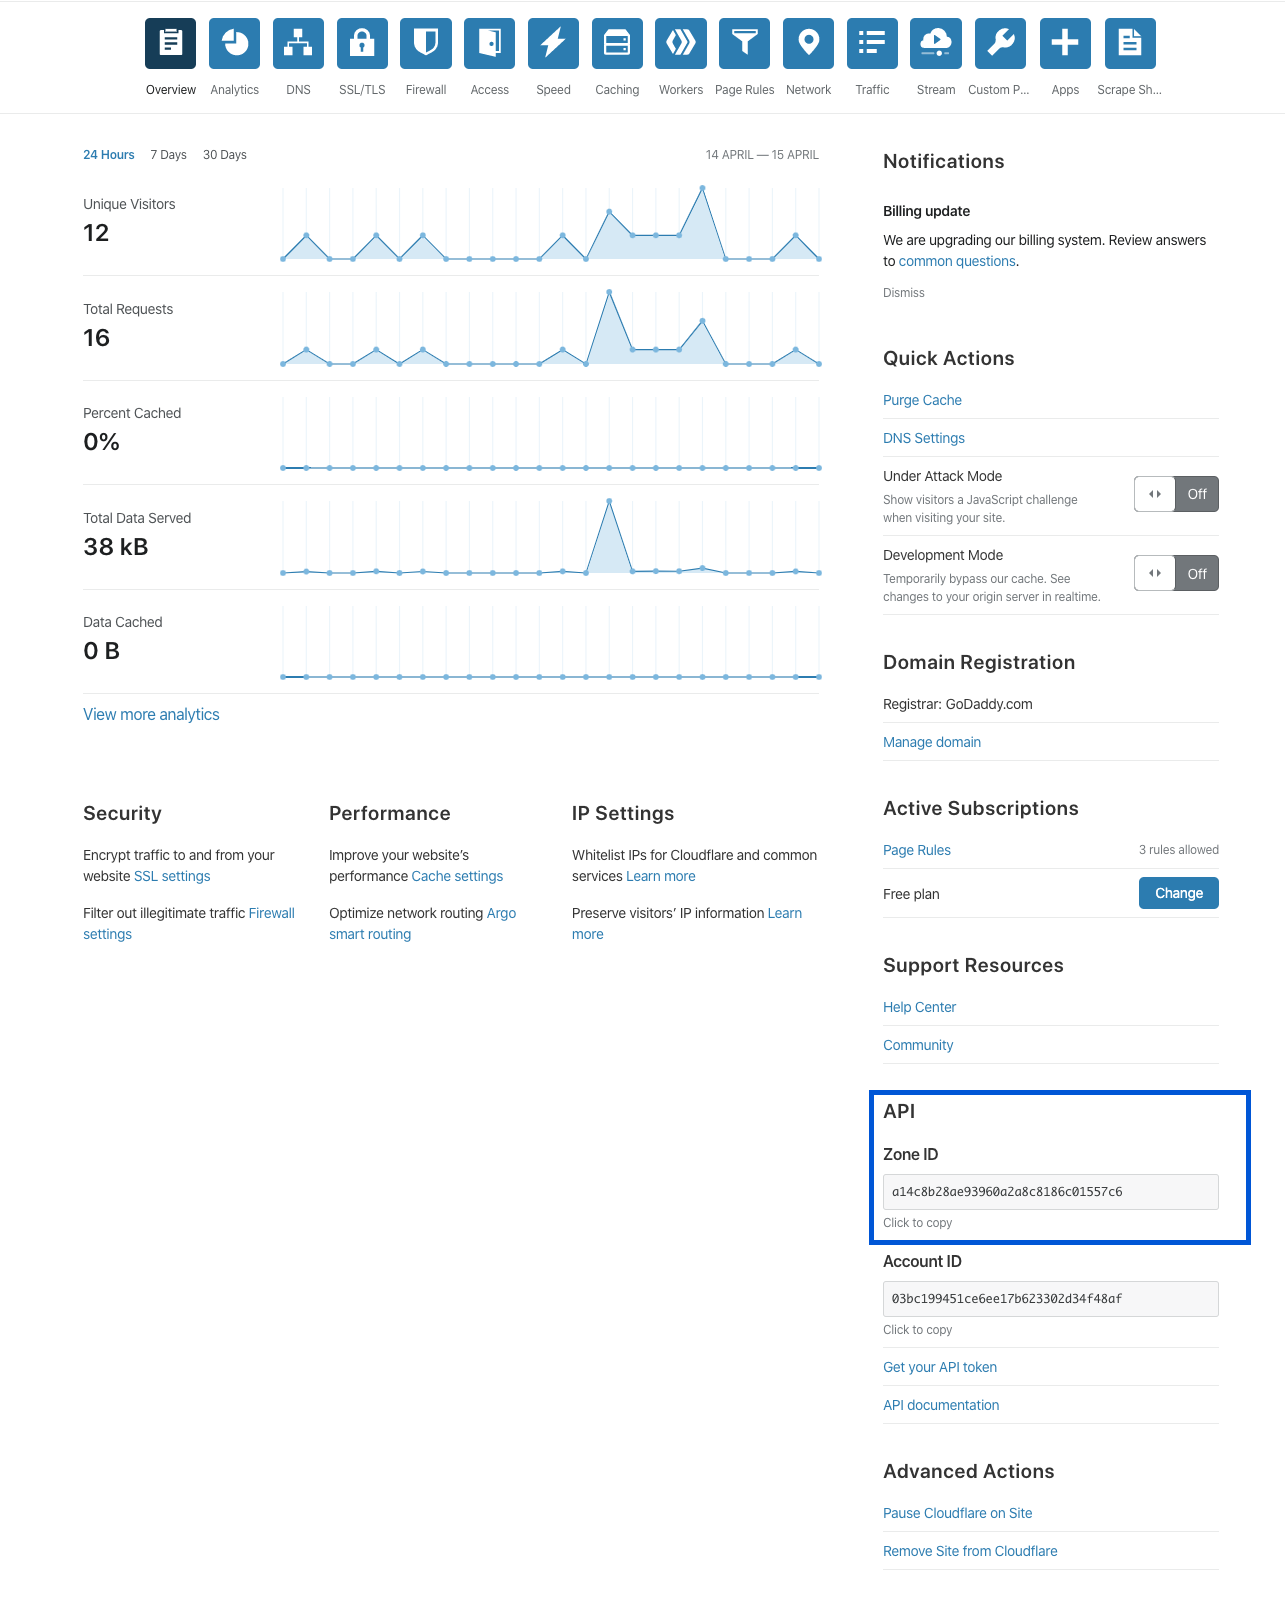
- Copy the Zone ID
Copy the Zone ID, and paste into the Zone ID field in the plugin configuration screen.
- Click the “Save changes” button
After validation of your settings, the automatic cache purging is set up and ready to be used. The plugin will now automatically purge any post, its archive page, and the front page on every post update you do in WordPress.
You can also use the “Purge all” option from the admin toolbar under Servebolt