This article is mainly for our clients which already have a Servebolt provisioned Cloudflare account. Let us know in support if you don’t have one yet and we’ll gladly set one up for you.
Time needed: 5 minutes
Here’s a step-by-step guide on how to set up a new free site on Cloudflare which is best suited for our environment:
- Add Site
First go to your account and click + Add Site. Then choose the free plan and continue
- DNS
Cloudflare will scan for already existing DNS records and this is usually pretty accurate, but it’s always good to double check that they got them all, or check if there is any records that you need to change
- Nameserver Change
Cloudflare will then ask you to change name servers. This is a crucial step to get your site on Cloudflare so follow the guide and change to the given NS records. That is done with your domain registrar
- Quick Setup
The next step is a very handy Quick Start Guide, click through and activate all the settings except for Auto Minify. Here should only CSS and HTML be activated
- SSL version
You’re technically done, but there is some other settings we can enable. First navigate to the SSL/TLS tab, then to Edge Certificates. Scroll down and set Minimum TLS version to 1.2
- Caching
Navigate to the Caching tab, then to Configuration. Set Browser Cache TTL to Respect Existing Headers
- Finishing Touches
The last thing to do unless you’ve already done so is to add your domain to our Servebolt control panel under your Domains section. You can find a more detailed help article on that here.
When that is done you’ll also need to enable a self-signed certificate in our control panel. You can find a button called Enable SSL under your domain, click it and add a self-signed certificate. Then be sure that your SSL/TLS Encryption mode is set to Full in Cloudflare. This is very important as if not enabled you’ll get a redirection error.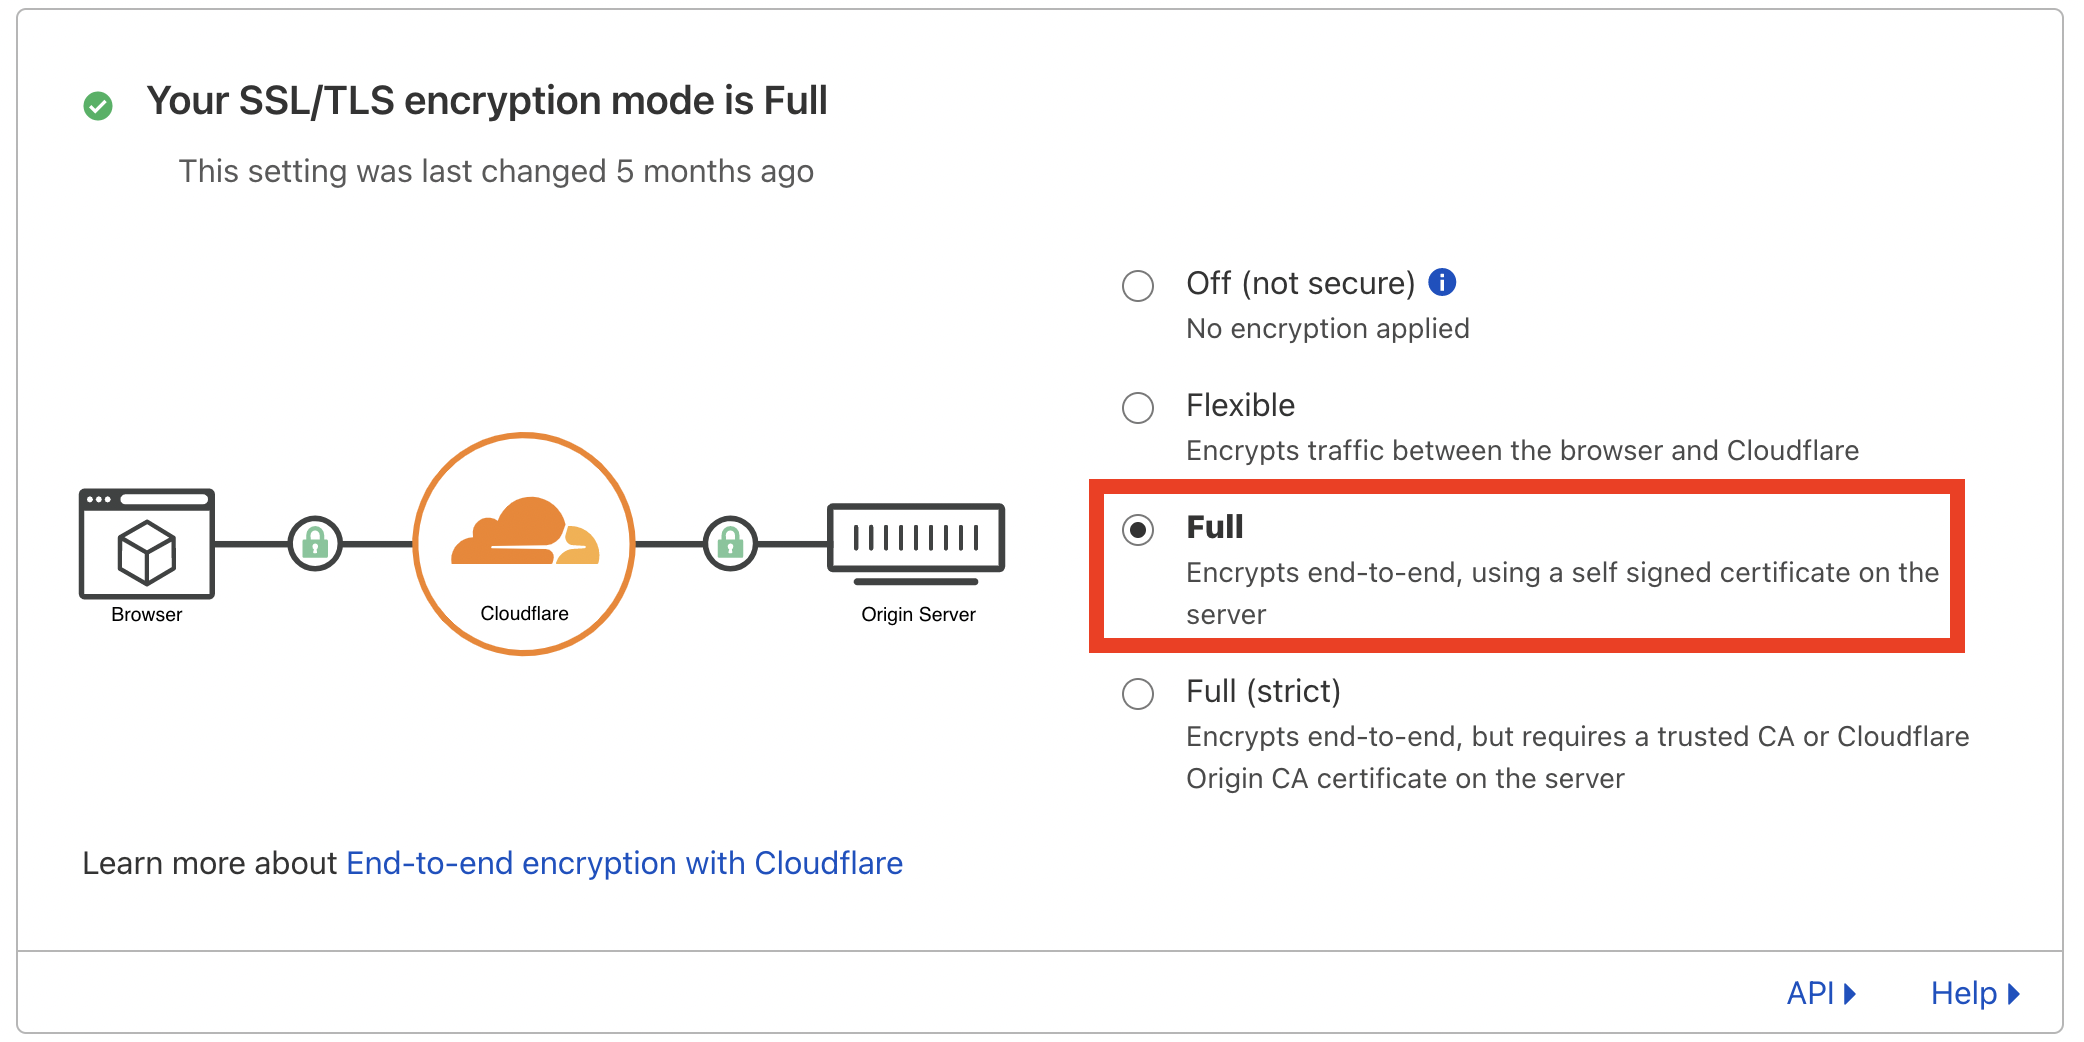
That’s all to it really but be aware that the name server change can take up to 24 hours before everything has propagated. When it has you should see a green checkmark in your Cloudflare Dashboard in addition to an email confirmation of its activation

Note that the only way to upgrade to a paid plan, add paid add-ons features or invite other member is through our support chat
Do you encounter any trouble or have any additional questions, please contact our support chat at servebolt.com