This guide will help you get your site live on Servebolt. The following steps will ensure you think of everything while moving from you old host to your new Servebolt Bolt.
Time needed: 30 minutes
How to go live with your site on Servebolt. Step 1-4 can be prepared hours or days in advance. Step 5 and further are the steps required for the actual move.
- Prepare DNS
If your site is on Cloudflare or Sucuri and is being proxied by them, DNS changes will be instant and there’s not much to prepare. If you want to add Cloudflare to your Servebolt subscription, you can very well do that before you plan to go live, because that will make the go-live process much simpler.
Depending on how critical it is to make an instant switch (e-commerce sites for example), you can check out this detailed guide on how to prepare your DNS. DNS changes propagate slowly, and may take up to 24 hours depending on your DNS settings. - Upgrade your Bolt to a paid plan
Log into the Servebolt Control Panel and navigate to the Bolt you want to upgrade. Click Upgrade to paid plan from the Bolt Dashboard, or use the Go live link, and select the plan that fits your needs. After running through checkout, your Bolt is reconfigured within seconds, and you’re ready for the next steps.
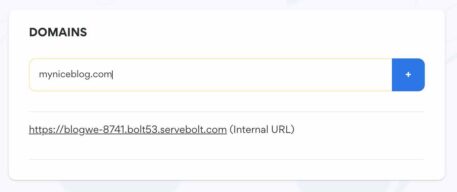
- Add the Domain names for the site in the Control Panel
Add all the domain names that you want to have active on your Bolt.
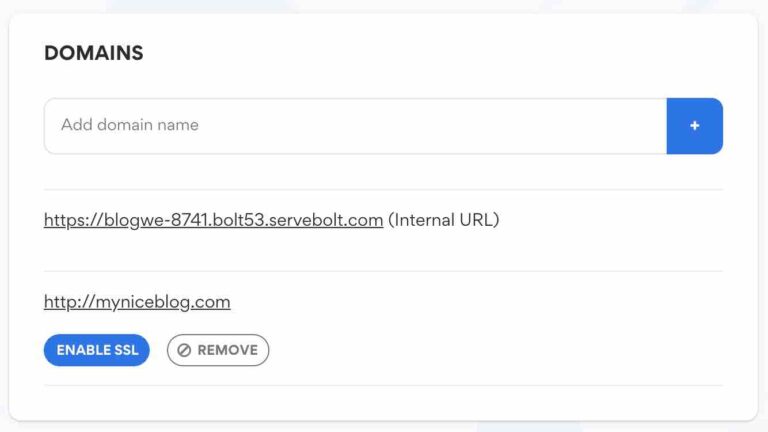
- Enable SSL for all domain names
Click Enable SSL and select the kind of certificate that suits your needs. If you want SSL to be active before the site goes live, you can contact support. We have multiple options that allow SSL certificates to be issued and installed before you point the DNS to point to your Bolt.
- Prepare the old hosting for migration
Put the old site in maintenance mode to ensure that you get a snapshot of your site so you don’t lose data (orders for example) during the move. The snapshot consists of the latest version of your database and files and folders.
- Update files and database on your Bolt with the latest version
Synchronize the files from your old hosting to Servebolt and import the snapshot database you’ve just procured at your old host. Our support team will happily assist you with this if you do not want to do this yourself.
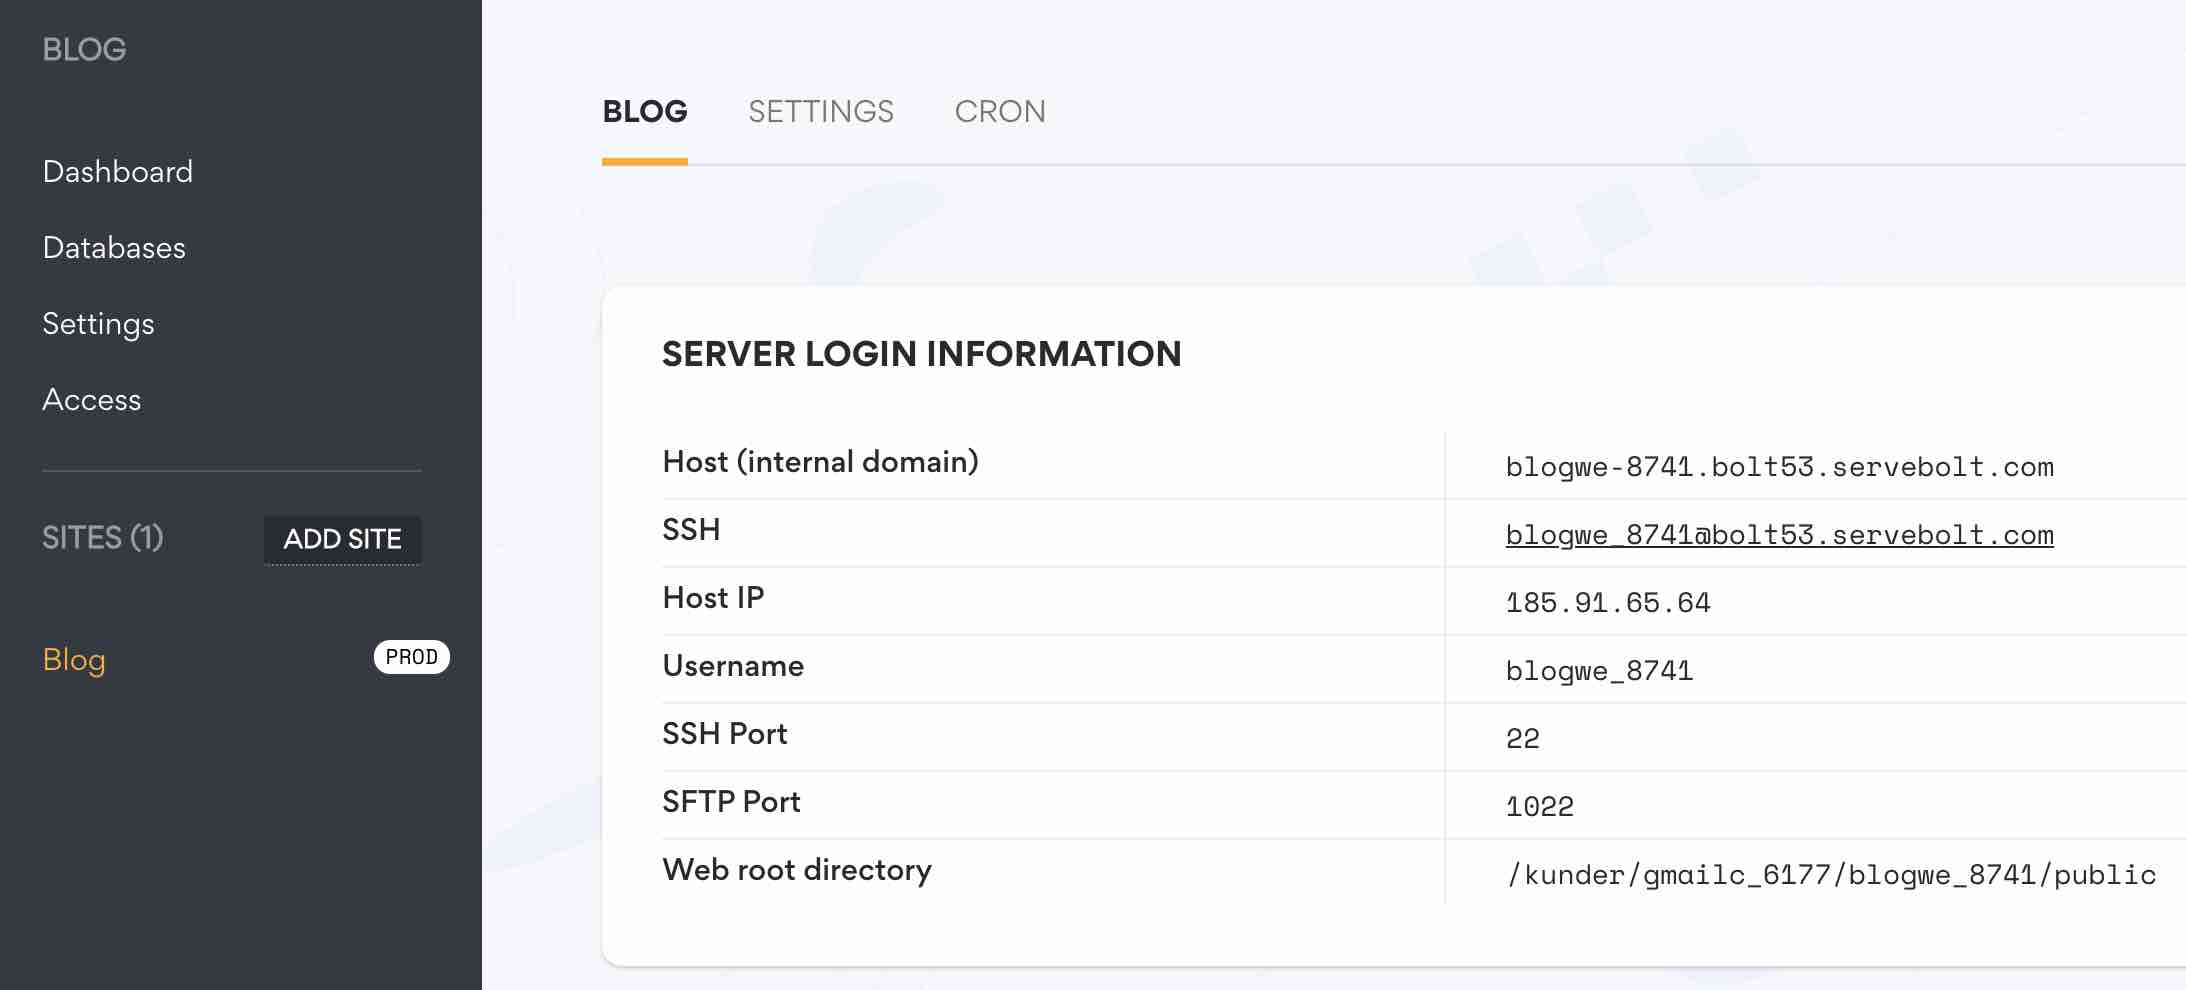
- Change DNS records to point to your Bolt
You can either make a CNAME record pointing to the internal domain, or make an A-record in DNS pointing to the Host IP. After this is done, traffic will be directed to your Bolt whenever DNS caches expire, that may take up to 24 hours – but is usually around 3 hours as a standard.
- Change Internal URL to Production URL
Your staging or trial site was working with an internal URL and this needs to be updated the domain under which the site will be live. The best way to do this is to use WP CLI for this with these instructions. If you’re not using WordPress, you’ll have to manually change those in your CMS.
- Check that everything is working like it should
If you enabled maintenance mode in step 5, you can now safely disable that. Go through and check that all functionality is working like expected.
After you’ve followed these steps your site will now be live on Servebolt. You will enjoy all the benefits of being on the fastest and most performant hosting.
Assistance
Do you need assistance with any of these steps? Our support team will be more than happy to help you out.
Should you run into any issues whatsoever, do reach out to our support team. They will be happy to help you figure out what’s going on.