
Running into the “Updating failed” or “Publishing failed” errors when trying to update content on your WordPress site? You’ve come to the right place. Let’s take a look at how to identify the root cause of these issues and how you can fix them.
What Causes the WordPress Updating and Publishing Failed Errors?
When your WordPress instance fails to communicate with the WordPress REST API (which the WordPress block editing experience relies on) – you are likely to run into the “Publishing failed” or “Updating failed” error in WordPress.

While there are several reasons why this might happen, the most obvious one is also the simplest: you’ve lost internet connectivity.
If you’ve lost connection, you may run into the Publishing Failed error. Other reasons why this might happen include the:
- A recent change to the site URL
- Any third-party service preventing API calls
- A malfunctioning plugin
In most cases, this is an easy fix.
Step 1 – Check Your Internet Connection & Save Your Permalink Settings
Arguably the most common reason why you get this error is when you lose your internet connection. If you unexpectedly lose connection while updating a blog post, WordPress can return this error. If you have ensured you are connected to the internet, open the post or page in edit view in a new tab (or ensure you copy/save the changes before navigating away from the page) and attempt to update the content again.
Another common resolution is simply re-saving your site’s permalink settings (normally lost by a change made to your hosting configuration). There are two super simple ways to do this, the first one we suggest is using WP CLI:
Refresh Your Permalink Settings With WP CLI
If you have access to your hosting environment via SSH, the easiest way to refresh your permalink settings is to:
1 – SSH into your server
2 – Navigate to the root directory for your WordPress installation
3 – Flush the existing permalink structure by running:
wp rewrite flush
4 – Update the permalink structure back to what you had been using previously, such as:
wp rewrite structure ‘/%postname%’
Note: If you are running these commands in a production environment, please proceed with caution, as changing the permalink settings to a different structure (without then changing it back to the same structure you were using) will result in a loss in traffic.
Refresh Your Permalink Settings In Your WordPress Admin Area
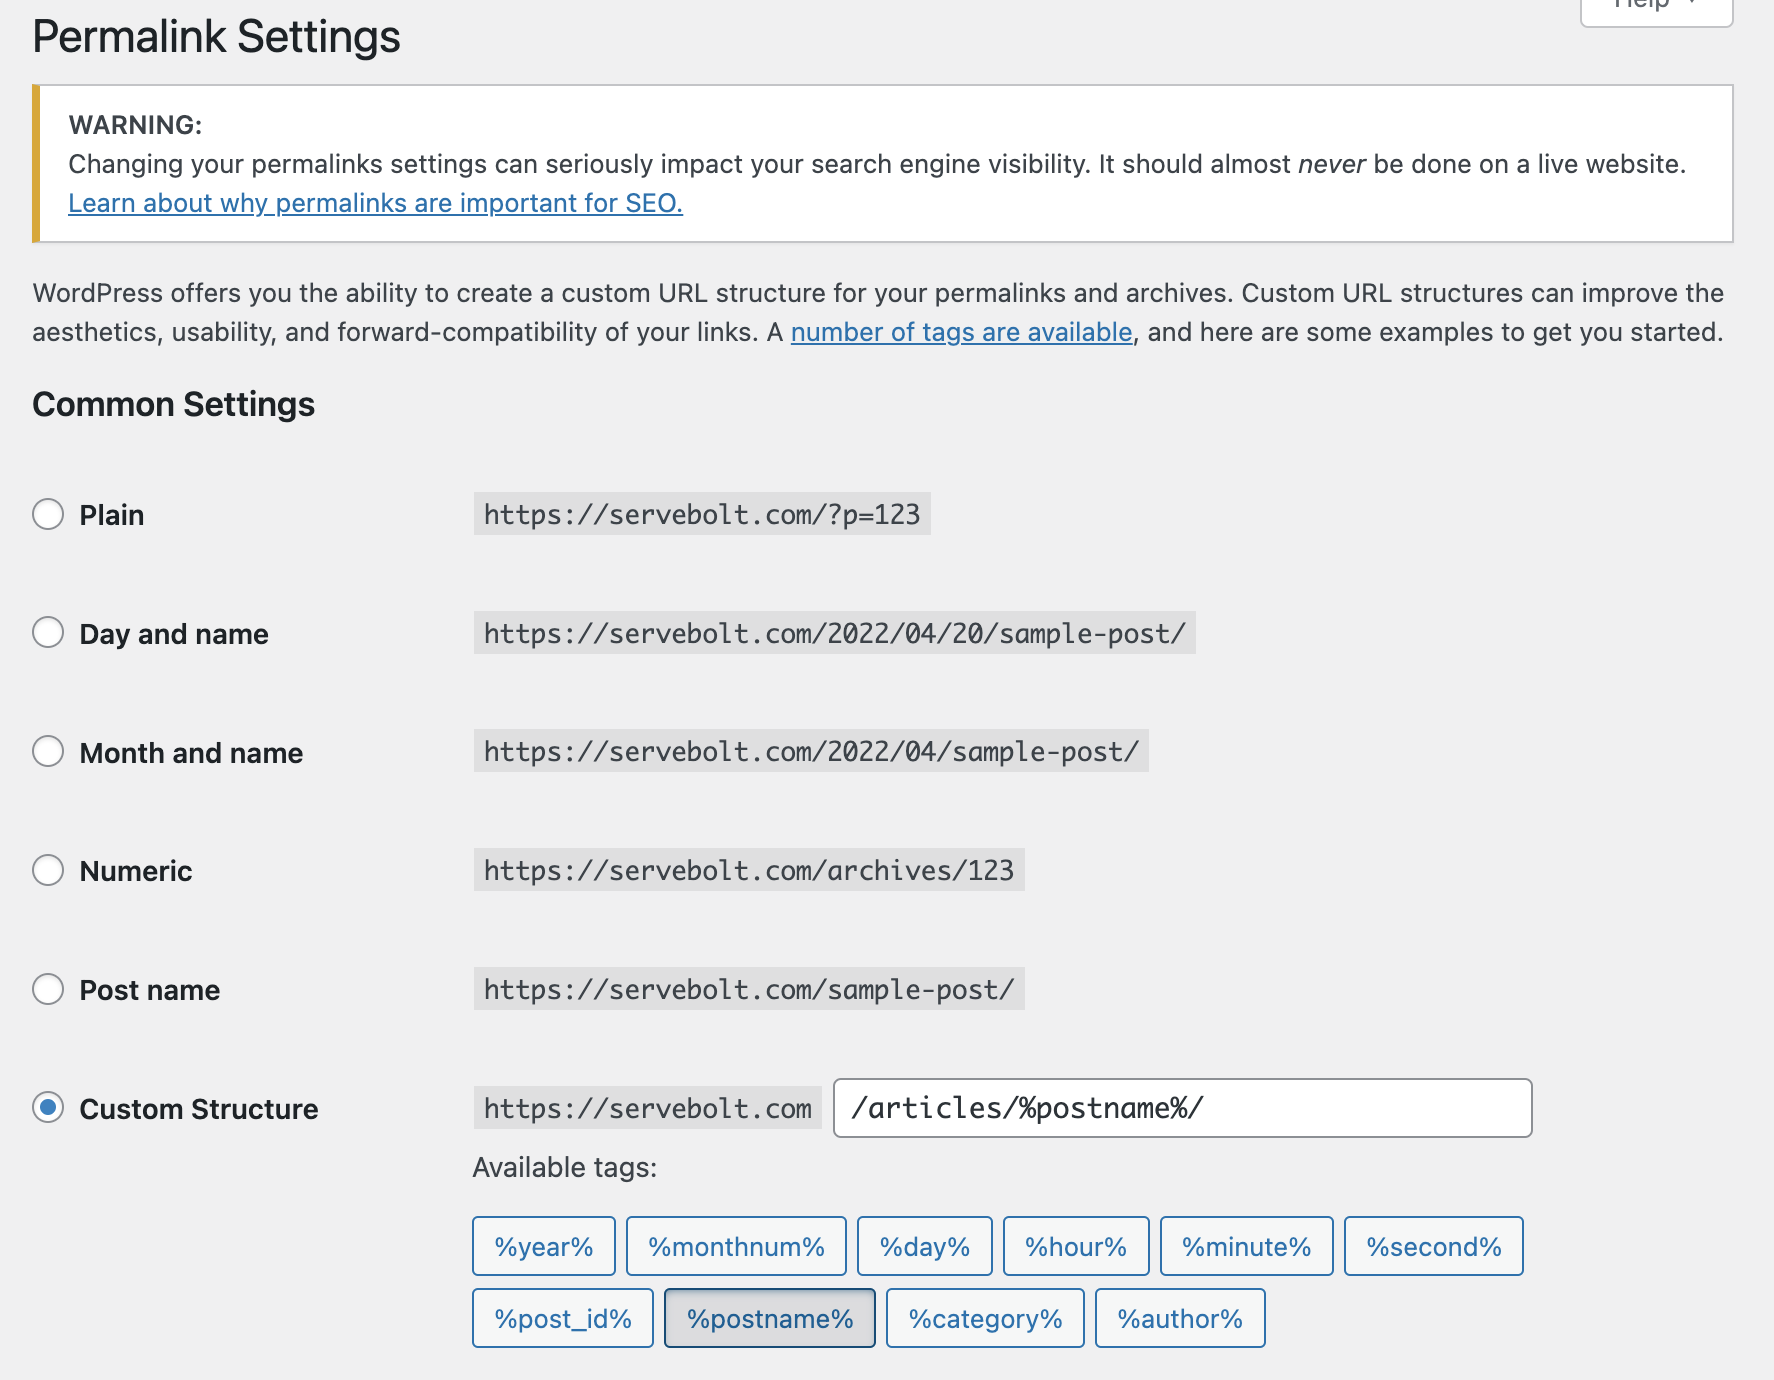
Alternatively, you can also make this change directly in your WordPress admin area in the permalink settings accessible under Settings > Permalinks, as shown below:
Step 2 – Check If The REST API Is Being Blocked
As mentioned above, another common reason why you might get the WordPress Publishing Failed error is if the REST API is disabled or blocked. Thankfully, WordPress has a nifty tool that you can use to check the REST API status.
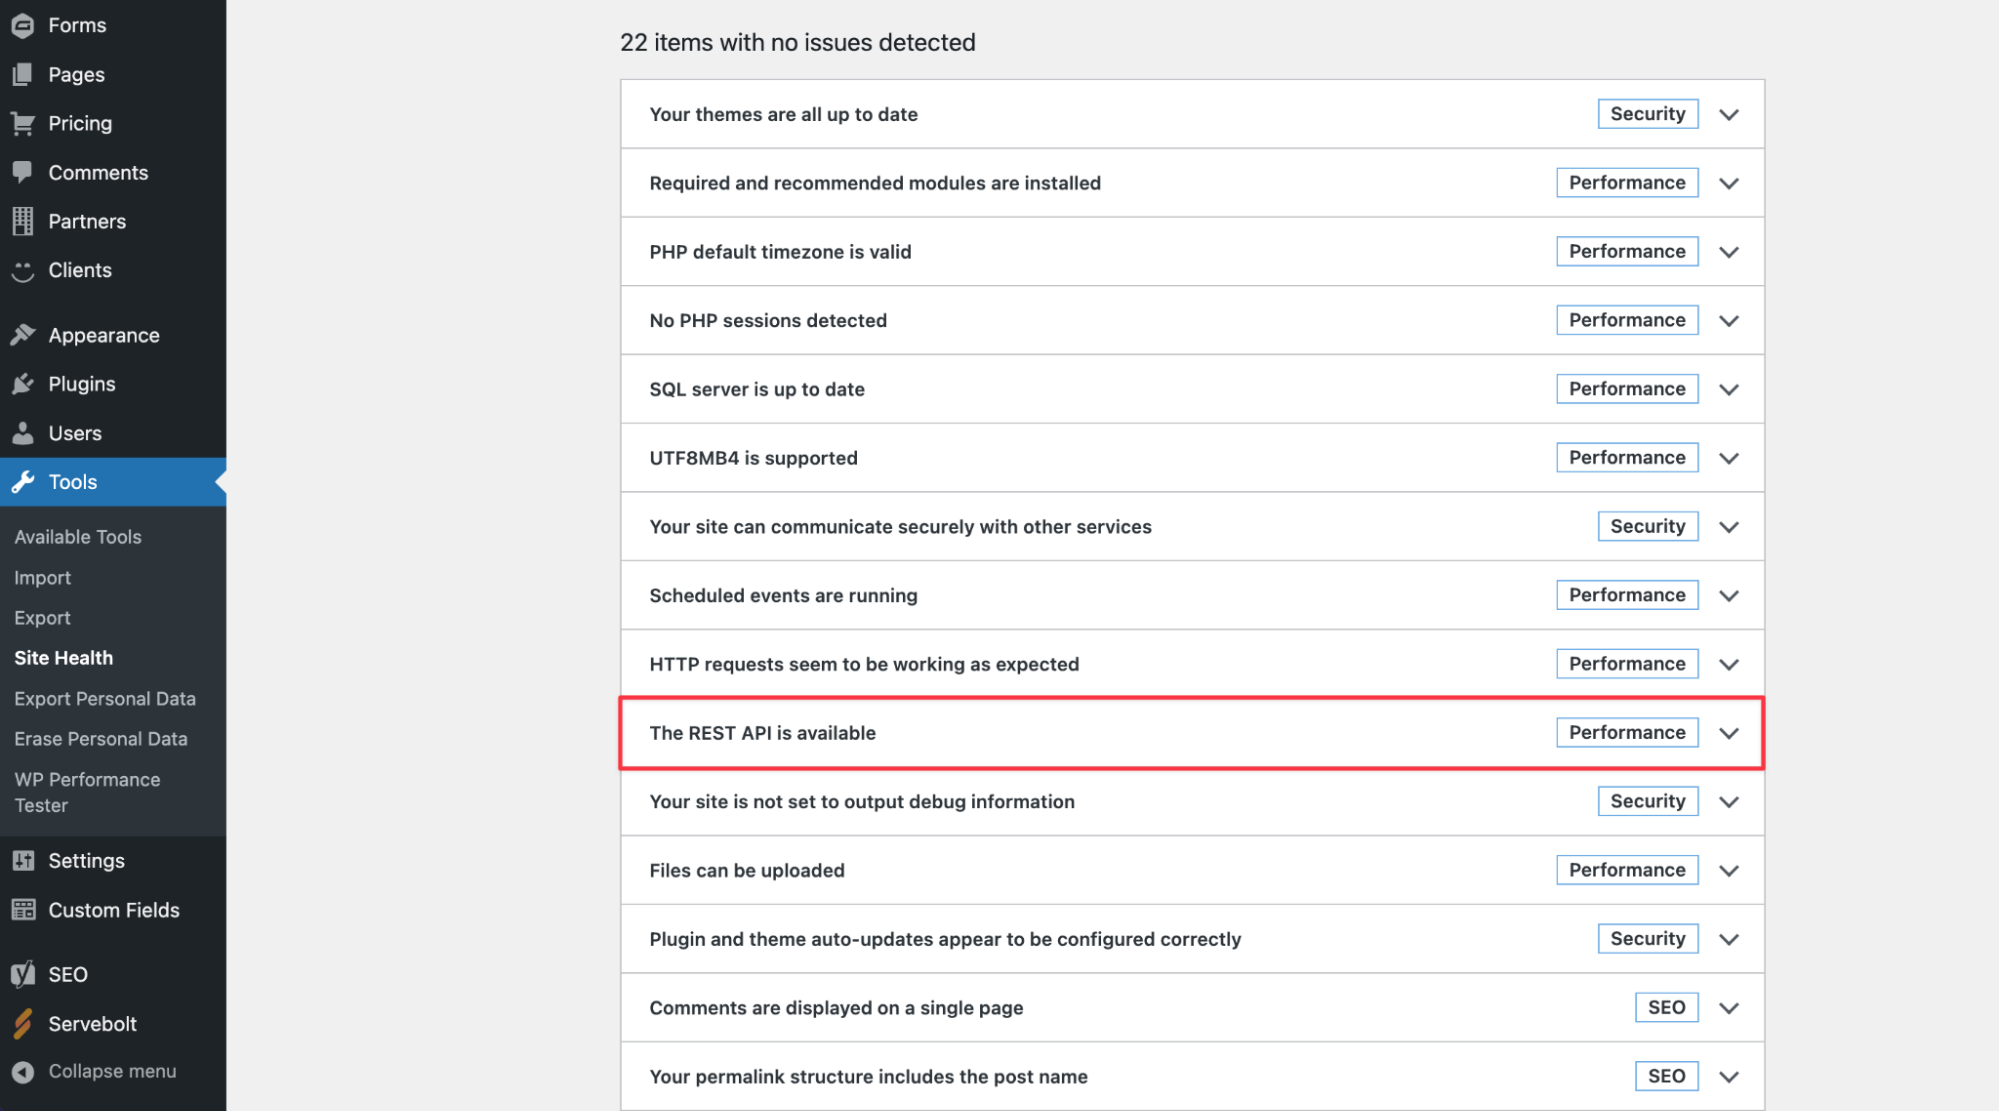
Simply go to Tools, then select Site Health. Here, you’ll see a bunch of errors associated with your WP installation. If the REST API is not working properly, you’ll see the following error:
“The REST API encountered an unexpected result.”
In addition to this, the Site Health report will also give you some tips on how to troubleshoot, such as when the REST API is being blocked by a particular plugin that you have installed & activated on your site.
That being said, the best way to debug the specific cause on your site is to check your browser’s console log, which could show something along the lines of:
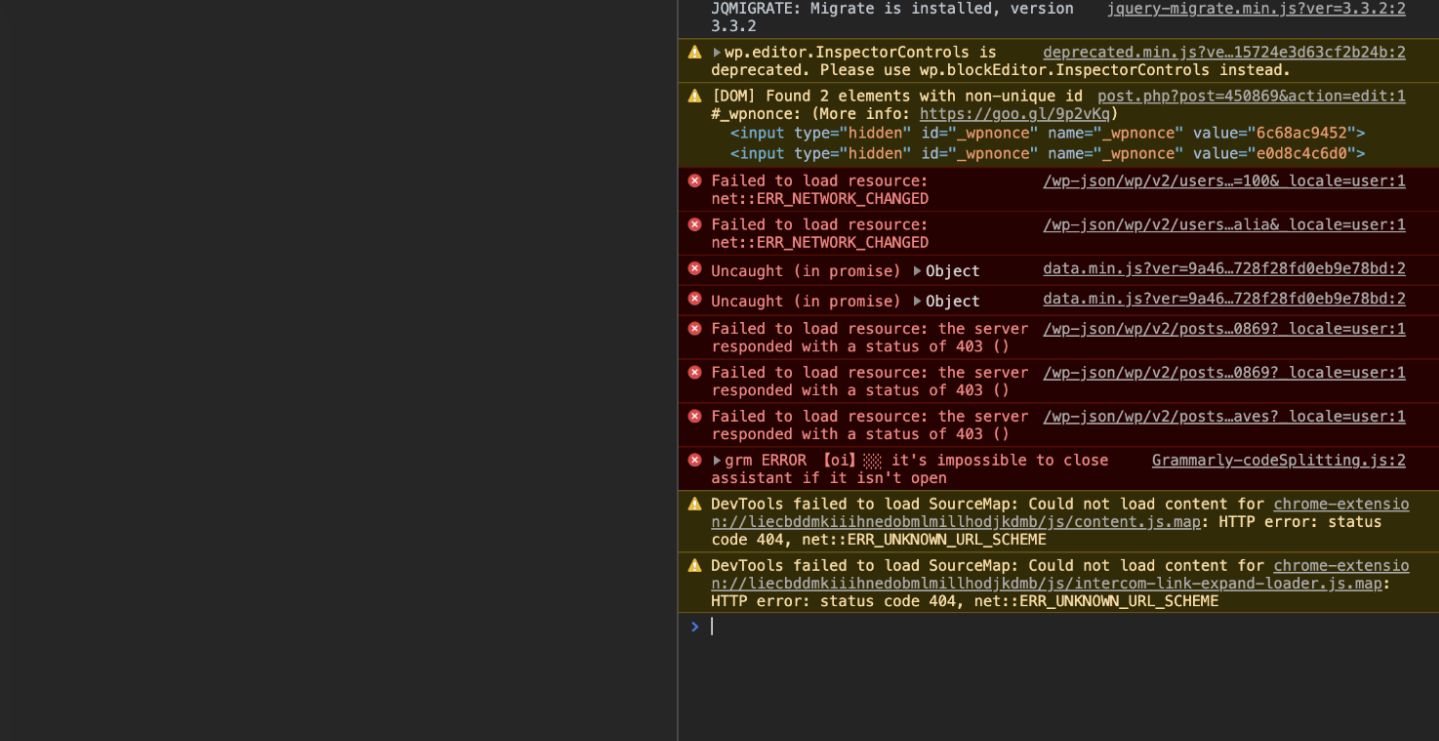
In the above case, the exact error message was “ERROR Updating failed. Error message: The response is not a valid JSON response.” and the cause of the error was that Cloudflare’s firewall had blocked the user’s IP from accessing the WP JSON.
So if the issue appears to be that you’re getting a 403 (forbidden) status code from the WP JSON or a REST API error, ensure that security measures (such as a web application firewall, covered next) that you have in place are not unintentionally blacklisting access to these directories that would prevent users from being able to publish or update content on your WordPress website.
Step 3 – Check Your Web Application Firewall Service
Cloudflare is the world’s largest provider of content delivery network (CDN) services, DDoS protection, Internet security, and DNS services.
We’re big fans of Cloudflare here at Servebolt – as a Cloudflare Optimized Partner that offers better networking connections between Servebolt and Cloudflare. We use Cloudflare Enterprise for various parts of our infrastructure, including the Servebolt CDN and our Accelerated Domains service.
If you’re using Cloudflare with your site, there is a chance that the service may block your REST API calls. If the firewall filters are triggered, and Cloudflare deems your IP address suspicious, it’ll immediately block all REST API requests, which can result in the “updating failed” or “publishing failed” error in the WordPress admin area.
In which case, before you go ahead and just whitelist your IP address as a quick fix to identify why your IP ended up being blocked by your own WAF, check your web application firewall’s analytics to see which firewall rule was triggered.
Step 4 – Review PHP Error Logs & Enable Debugging Mode in WordPress
Before resorting to enabling WP Debug and using WordPress’s own debug system, those of you using Servebolt will be able to easily access your PHP error logs.
By default, all sites running on the Servebolt Cloud will generate two logs – ErrorLog & AccessLog. These can all be round in the root of your site in the /logs folder (i.e., at the same level as the /public directory).
The ErrorLog file will contain information about any code running on your site that generates runtime errors (this includes errors that won’t break your site and will continue silently failing in the background, but sometimes do).
And, in the event that this doesn’t provide any further information about what the origin of the error could be, you can enable debugging mode in WordPress. When you enter debugging mode, WordPress will automatically log any PHP responses received in a new file called debug.log.
This new file will appear in the wp-content directory, so you just have to take a look to determine any server-side responses that might be causing the problem.
To enter debugging mode, open up your wp-config.php file, and just before the last line, add the following lines:
// Enable WP_DEBUG mode
define( ‘WP_DEBUG’, true );

// Enable Debug logging to the /wp-content/debug.log file
define( ‘WP_DEBUG_LOG’, true );

// Avoid publicly showing errors on a production site (this defaults to true if not declared)

define( 'WP_DEBUG_DISPLAY', false );
Once you review the debug.log file, you can then remove this code from your wp-config.php file to exit debugging mode.
With Servebolt, you will have access to your PHP error logs by default, including the ErrorLog and AccessLog, in addition to the Slow Query Log, which is available on request by contacting our support team. However, WordPress’s own debugging system is great for identifying errors so that you can run a tight ship, keeping your codebase under control.
This really goes without saying, but when making changes to your wp-config.php file, do proceed with caution, and it helps to back your site up. Websites running on the Servebolt Cloud are backed up twice a day – we run day-time backups (stored for 3 days) and nightly backs (stored for 30 days).
You can also back up your WordPress site yourself. To restore a backup, simply contact our support team, and we’ll restore your most recent backup at no additional cost.
Step 5 – Disable All WordPress Plugins And Check Again
If you have a suspicion that the error is being caused by a WordPress plugin on your site, one option is to disable all the plugins and check whether that fixes the problem.
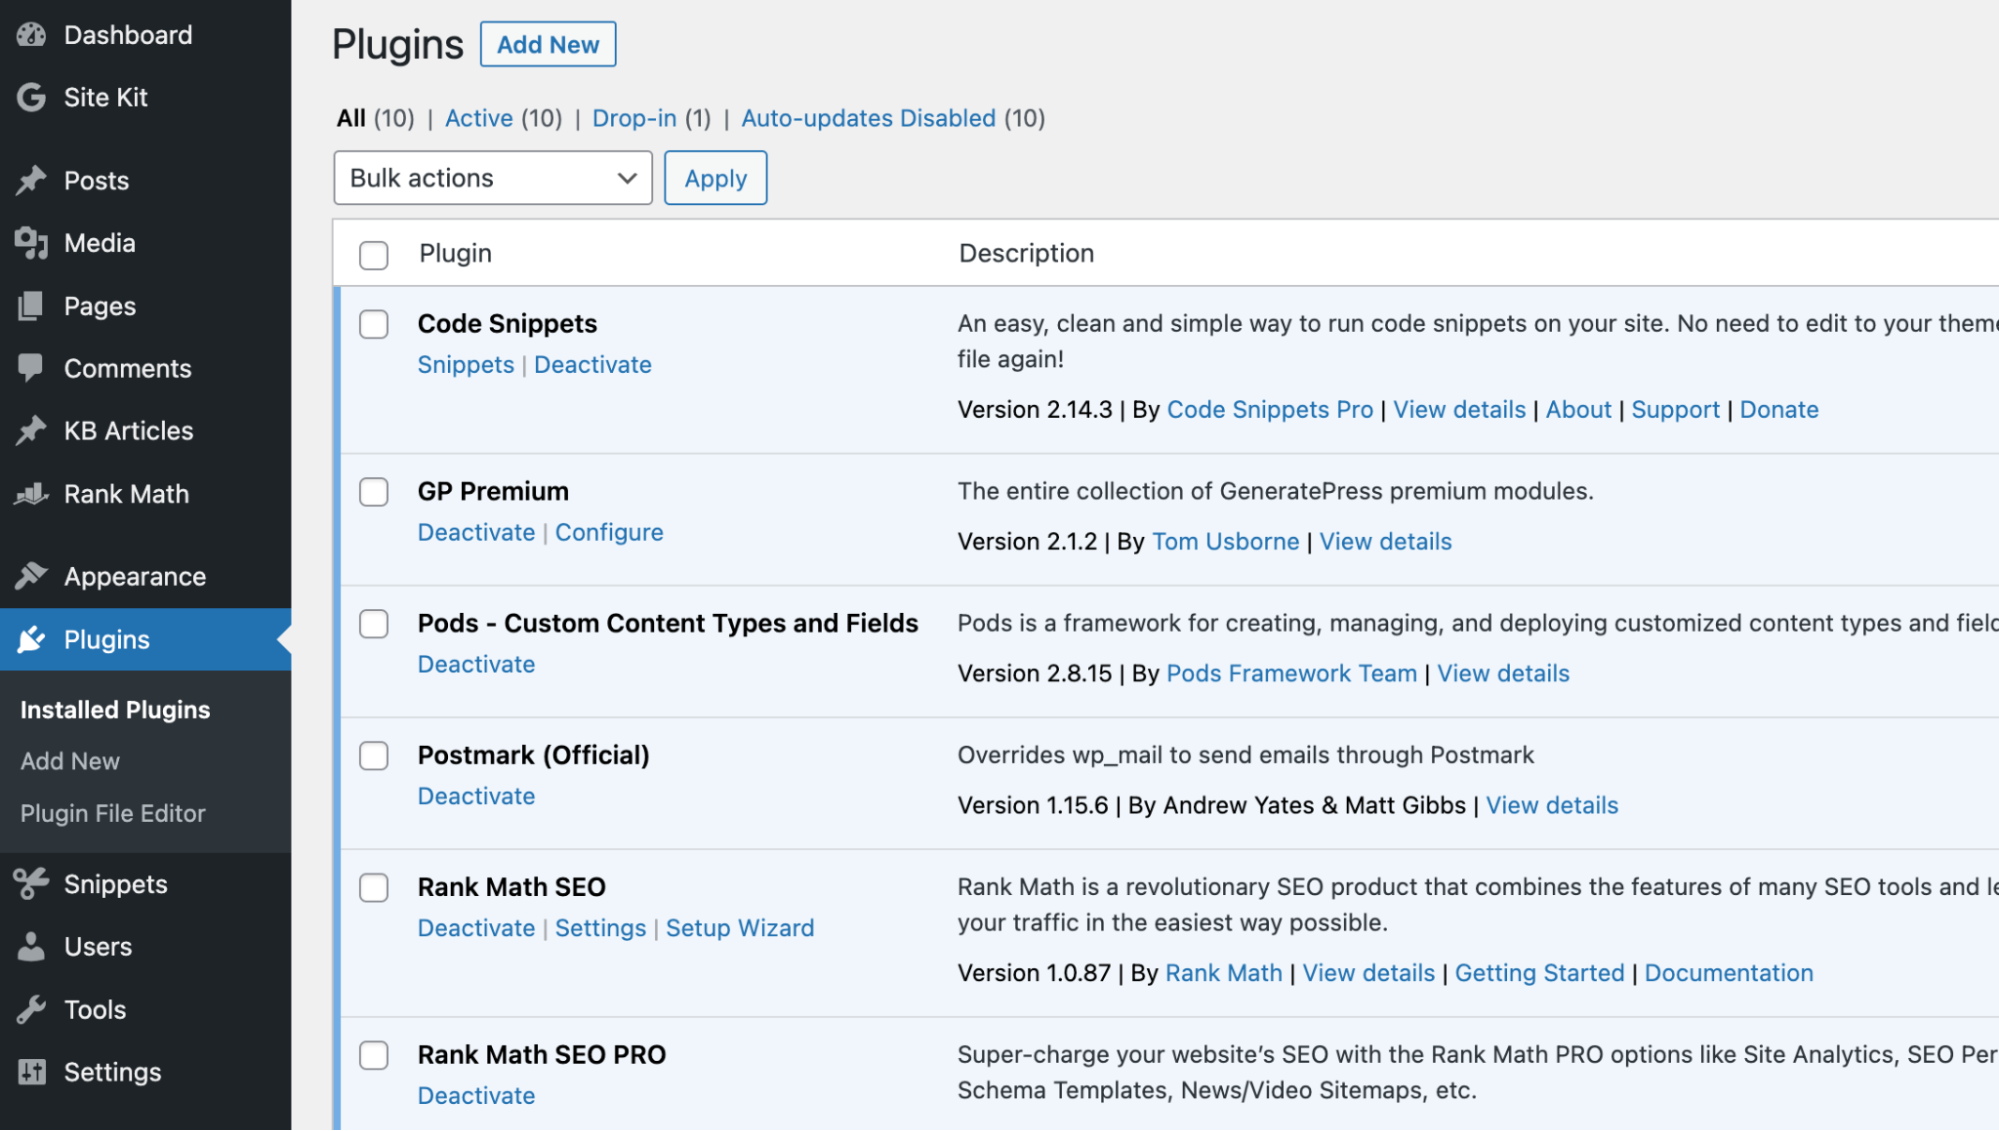
To do this, simply go to Plugins, then select Installed Plugins. Then, simply select all plugins, and deactivate them in one go using the Bulk actions dropdown.
Next, go back to your screen and see if the WordPress updating or publishing failed error still persists or not. If not, now you’ll know that a plugin running on your site is causing the error. The brute force method of identifying at this stage is to re-activate plugins one by one and check when you get the error again. And, by process of elimination, you’ll be able to identify the plugin at fault.
Once you find the issue, we strongly suggest that you contact the plugin author to let them know and offer to get them any information they’d need to debug, as this helps them improve their products for you (and all their other users). This certainly wouldn’t be our first choice when it comes to debugging, given it’s evidently quite tedious and time-consuming.
Temporary Workaround: Install the Classic Editor plugin (not a solution)
The introduction of WordPress Version 5.0 marked the introduction of the Gutenberg editor, i.e., the concept we all widely refer to today as blocks.
Although this is merely a temporary workaround, switching from the Gutenberg editor to the Classic Editor may allow you to save and update your posts.
Note: This evidently isn’t a solution, so it should only be used as a temporary workaround.
To switch from Gutenberg to the Classic Editor, simply download the Classic Editor plugin and activate it on your site. Once it’s activated, just go back to the post (or page) you were editing, and then you should be able to update or publish again as usual.
Step 7 – Reach Out To Our Support Team
If none of the above ends up being the fix in your case and you’ve made the wise decision to host your WordPress sites on the Servebolt Cloud, feel free to reach out to our support team. We’re available via chat and email, so just get in touch, and our team would be more than happy to look into what could be causing this issue for you.
Conclusion
Running into any error, especially one that prevents you from saving work or hitting publish on that new piece of content you’ve been working on, is not something anyone wants to happen. As such, while there are straightforward fixes and temporary solutions that you’ll often find are encouraged – we strongly recommend identifying the origin of the issue so that you can take measures to ensure that it doesn’t happen again.