In this guide, we will focus on how to set up a subdomain in your Servebolt Control Panel, as well as setting it up with Cloudflare. You can have a look at our help article on The default URL structure for more in-depth information about the URL structure. Please note that if you are looking to change the domain of your site, we have a guide on that here.
Requirements for setting up subdomains with Cloudflare:
- A paid Bolt plan
- Domain running on Cloudflare
- Access to the Cloudflare zone
Adding a subdomain in the Servebolt Control Panel
When you are logged in to your Servebolt account, you can navigate to the Bolt in question, and then to the site on which you’d like to add the subdomain. On the right-hand side, you’ll see the current domains (including the internal domain provided by us). To add a subdomain, you type in your desired subdomain as shown in the picture below, and click the blue “+” button.
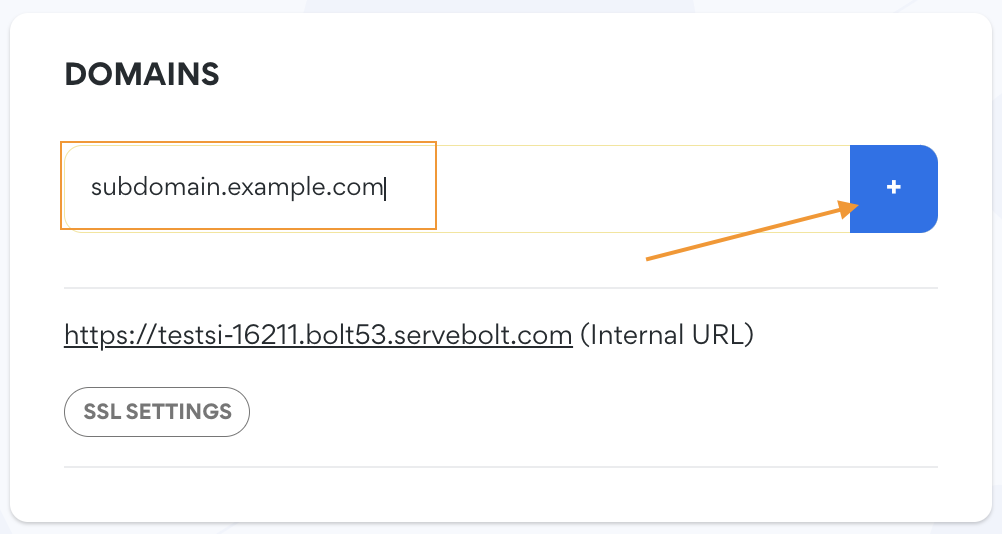
Congratulations! The subdomain has now been added to your Control Panel. The next step is to add an SSL certificate to the domain. In this example we are going to set the subdomain up with Cloudflare, so we will be using a “Self-Signed Certificate”.
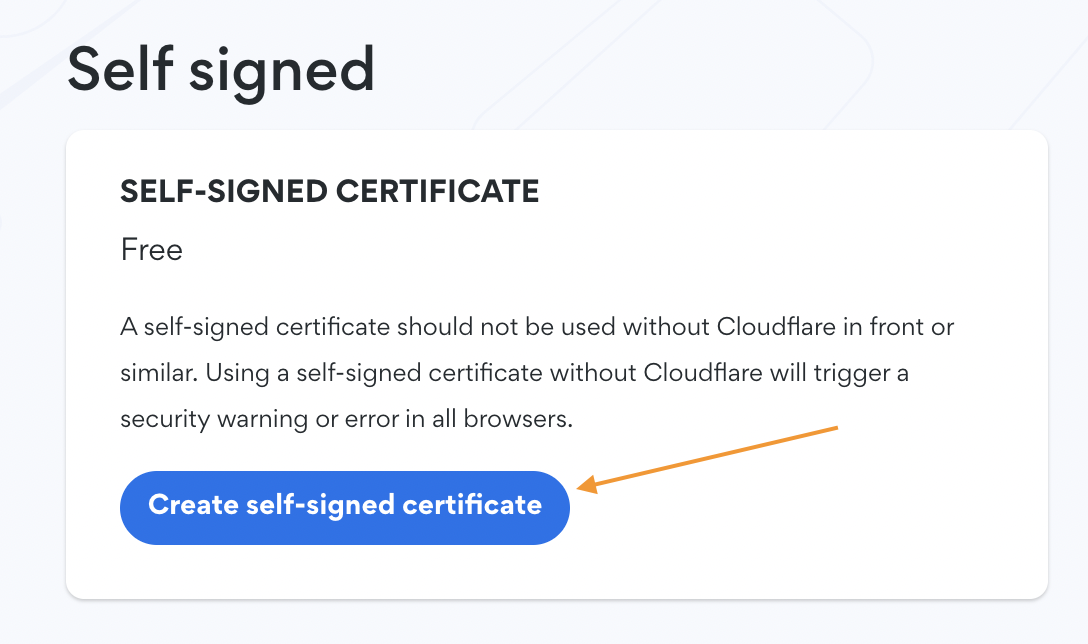
Click the blue “Enable SSL” button to proceed to the SSL settings for the domain. On the next page, you’ll see an option to “Create a self-signed certificate”, click it (it’s free):
Once this has been done, the self-signed certificate should be in place for your domain, and the “Enable SSL” button has changed to state “SSL Settings” – you can click on that to see the actual certificate details. This is also where you can change the certificate from the currently active one to another in the future.
Setting up a subdomain in Cloudflare
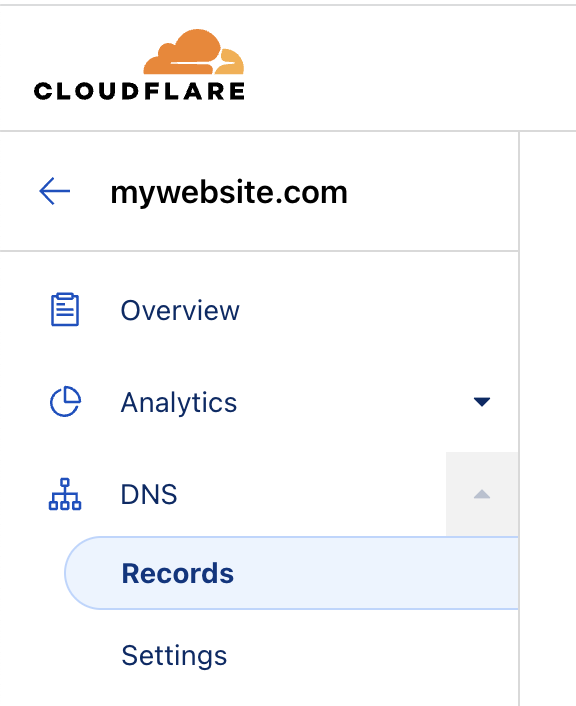
When you are logged in to your Cloudflare account, you’ll first see your Cloudflare zones (if you have access to more than one), and the websites under your control. Navigate to the site you’d like to add the subdomain to, and then to the DNS tab on the left-hand side.
This is where you’ll find all DNS records for the site in question. To add a subdomain to an existing site, you have to add an A-record to the DNS. The A-record is to be pointed to your Bolt’s Host IP, which you can find in your Server Login Information section in the Servebolt Control Panel:

The actual record pointing to the server will look something like this (keep in mind that the Cloudflare proxy has to be toggled on for the self-signed certificate to work as intended):

You can also have a look at our Cloudflare and SSL Options FAQ for more information on how the settings related to SSL and TLS for your domain should be set up. Keep in mind that for the Self-signed certificate to serve your site with HTTPS, you need to select the “Full” setting in the SSL/TLS overview in Cloudflare to activate a fully secure and encrypted connection to your site.
Once this A-record has been added and the SSL/TLS settings have been set, the subdomain should be up and running and is now pointing to the Bolt – as long as your site’s setup allows the new subdomain to be reached. You can have a look at our article on how to Update your site URL with Better Search Replace for WordPress. Now all that remains is to make sure that everything is working and running as expected by visiting the site and navigating through it.
And as always, should you have any additional questions please don’t hesitate to contact our support chat at servebolt.com!