In this article we’ll cover how you can install Pimcore version 10.3.4 on Servebolt based on Pimcore’s documentation. The only needed prerequisites are that you know how to use SSH and common terminal commands.
Time needed: 10 minutes
- Create a Bolt with PHP version 8.0+
Pimcore version 10.3.4+ requires PHP version 8.0+, so make sure you create a Bolt that uses PHP version 8.0+.
- Add a new site
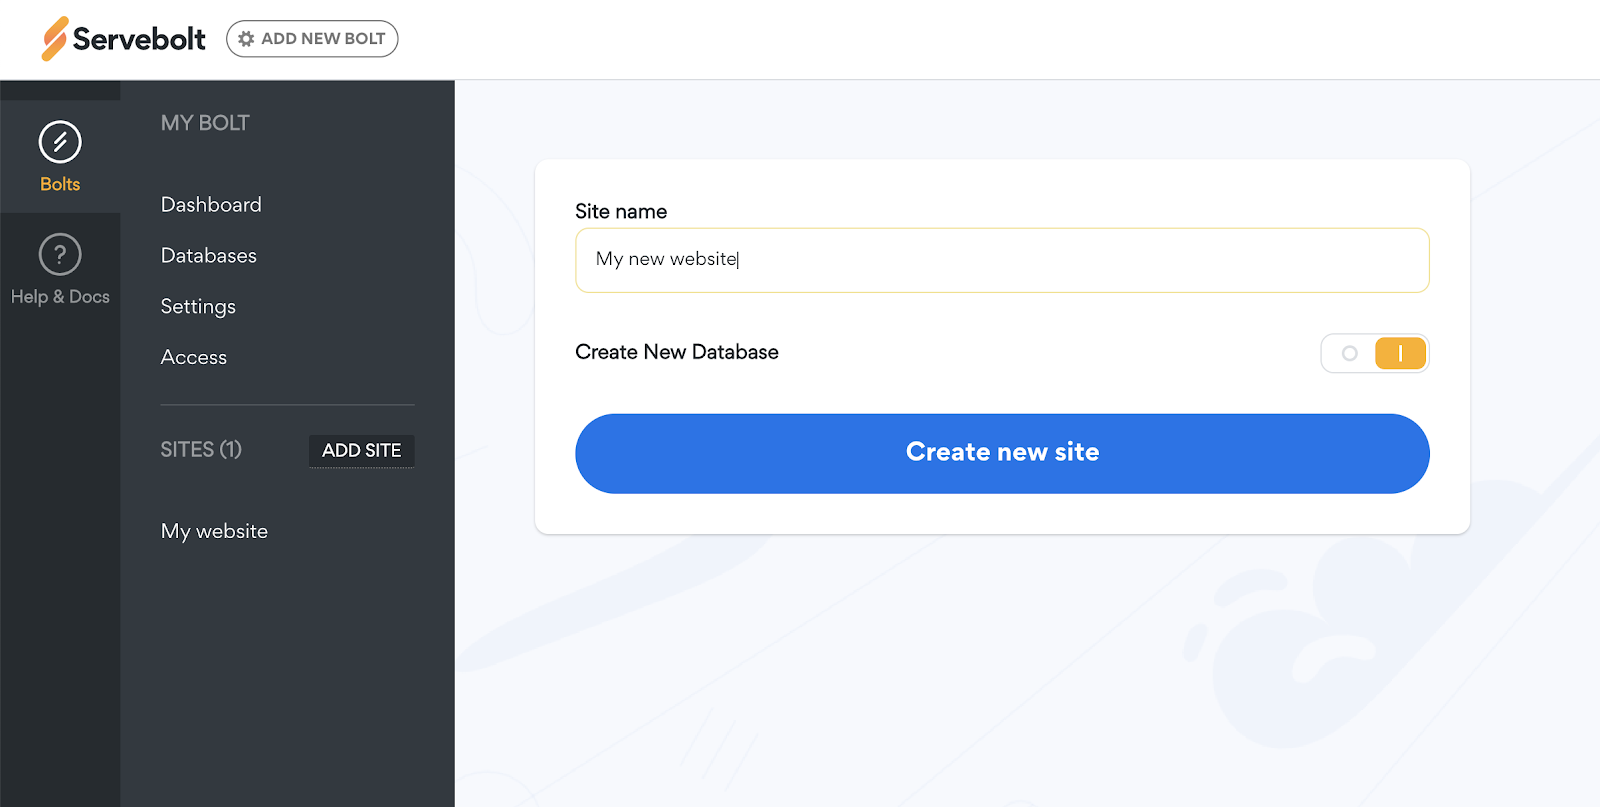
Start by adding an additional website with us. To add a new site in our admin panel, click the “ADD SITE” button. Then select a Site name and click the “Create new site” button. You’ll see a confirmation and receive an email with SSH/SFTP and database information for the new website. Click “Create new site” and note down your database name and password.
- Login using SSH and install Pimcore
Login to your new site using SSH and run these commands for installing Pimcore:
1. Deleting the default created ~/public directory is needed, as Pimcore uses public by default itself:rm -r ~/public
2. Install Pimcore from the root folder named “my-project”:COMPOSER_MEMORY_LIMIT=-1 composer2 create-project pimcore/skeleton my-project
3. Symlink Pimcore folder:ln -s ~/my-project/public public
4. Navigate to your Pimcore folder, in this example we named it “my-project”:cd ~/my-project/
5. Finish Pimcore installation from your Pimcore folder with command:./vendor/bin/pimcore-install
Now fill in your desired admin username and password, then your database name and password found in the Control Panel of your site in Servebolt:
Admin username:>your_admin_username
Admin password (input will be hidden): >your_admin_password
MySQL username:>your_database_name
MySQL password (input will be hidden):>your_database_password
MySQL database:>your_database_name
This will install Pimcore with the given settings. Do you want to continue? (yes/no) [yes]:
>yes
When Pimcore is fully installed you’ll be presented with a message in your terminal saying “[OK] All assets were successfully installed.”. You will also be able to access your newly installed Pimcore site in the internal URL of your site within the Control Panel of Servebolt. - Setup Pimcore cron jobs
In the final step we’ll also set up Pimcore cron jobs based Pimcore’s documentation. Cron jobs can be set up in the Control Panel of your site in Servebolt. We’ll also be adding the –quiet parameter so you don’t get a cron mail every 5 minutes.
# this command needs to be executed via cron or similar task scheduler
# it fills the message queue with the necessary tasks, which are then processed by messenger:consume*/5 * * * */your/project/bin/console pimcore:maintenance --async
# it’s recommended to run the following command using a process control system like Supervisor
# please follow the Symfony Messenger guide for a best practice production setup:
# https://symfony.com/doc/current/messenger.html#deploying-to-production*/5 * * * */your/project/bin/console messenger:consume pimcore_core pimcore_maintenance --time-limit=300 --quiet
Below is an example image of how a cron job can look like after being added to your Pimcore installation: - Create a .htaccess file in ~/public/
To finish setting up Pimcore, a
.htaccessfile has to be created and placed in the~/public/directory. You can find the required.htaccessrules in Pimcore’s official documentation.


Now you are done setting up your Pimcore installation, congratulations. You will be able to access your newly installed Pimcore site in the internal URL of your site within the Control Panel of Servebolt. The admin interface of Pimcore can be opened at: https://your-host.com/admin.
For more information on Pimcore and commands, use command ~/my-project/bin/console --help or visit Pimcore’s documentation.