Cloudflare offers a couple of settings related to SSL and TLS for your domain. This article covers the frequently asked questions about this.
Almost. You’ll need, at the bare minimum, a self-signed certificate on the origin – which we provide for free. Head over to the SSL settings for your site in the Servebolt Control Panel to generate a free self-signed certificate.
Once the certificates are activated, you’ll need to head over to Cloudflare’s Dashboard and click the “SSL/TLS” tab on your left side. There you select the “Full” setting to activate a fully secure and encrypted connection to your site. 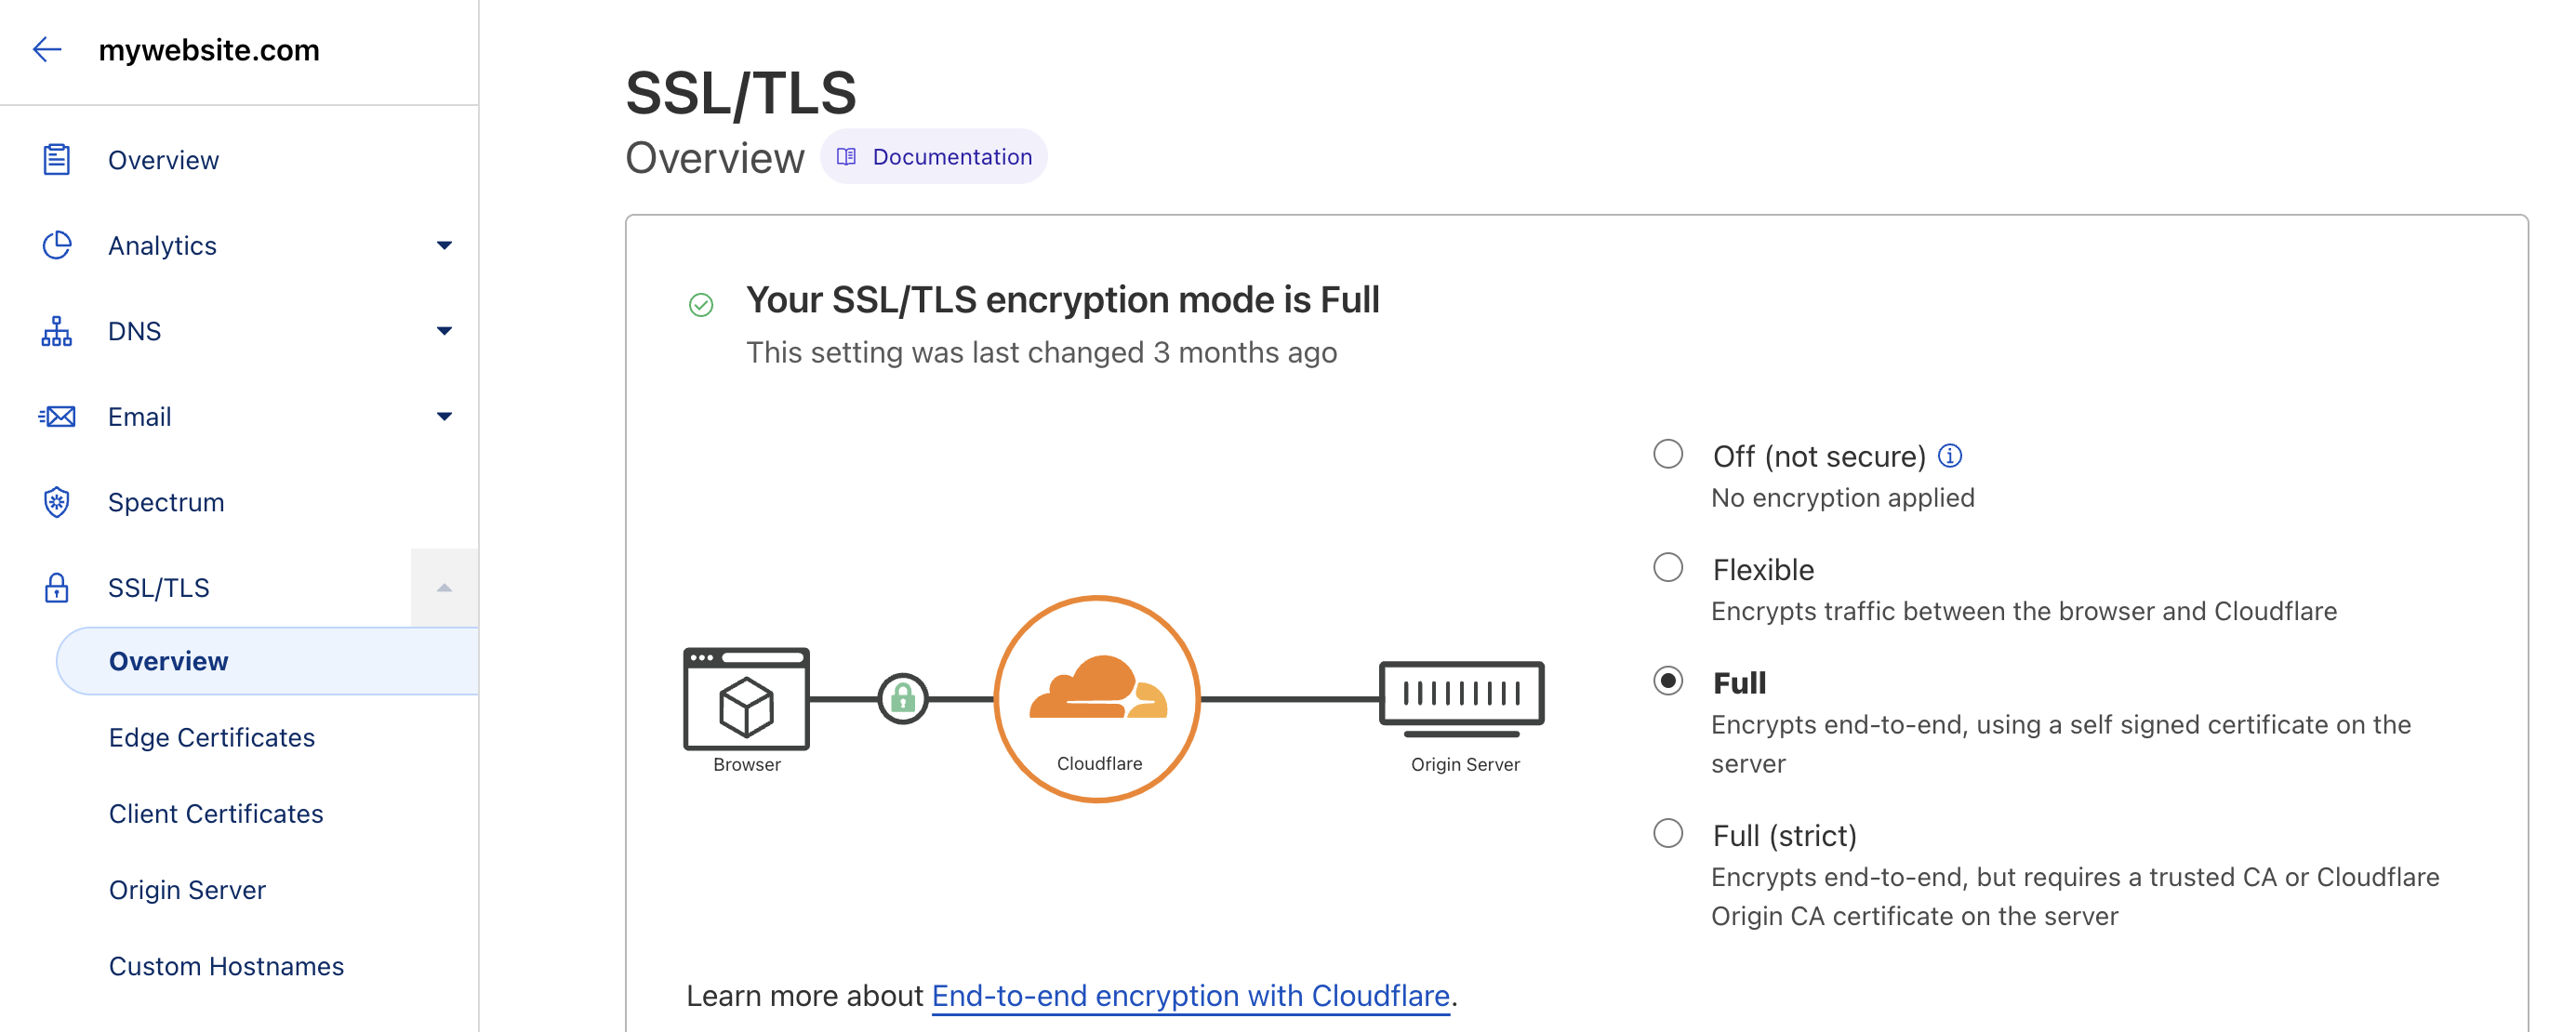
Yes, you can. A subdomain like sub.sub.example.com will work with Cloudflare just fine, but you can’t use a self-signed certificate for that. Cloudflare does not support that. You’ll need to purchase a certificate for your site to make this work.
Head on over to the Control Panel of your site and click on the SSL settings to go to the SSL ordering screen.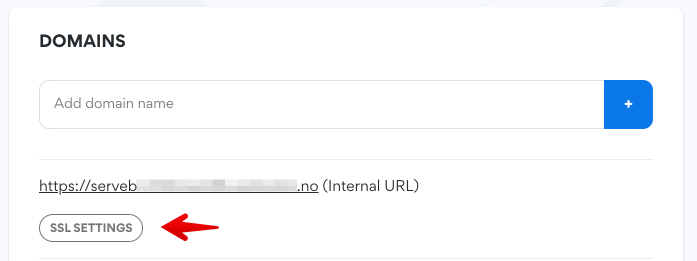
Yes! Cloudflare offers an option that will rewrite your internal content, images for example, that are served over HTTP while your site is served over HTTPS. Mixing the two will basically deliver insecure content inside a secure container and thus rendering it insecure again.
Luckily, Cloudflare offers a super simple solution for this. Head on over to your SSL/TLS settings tab and turn this option on:
Yes it can. There’s are two fixes for this. The first option is a half-measure, but it might just be the fix for you. The second option is best solution.
1. Navigate to your SSL/TLS tab of your site in your Cloudflare dashboard and change the following setting to the minimum value of TLS 1.2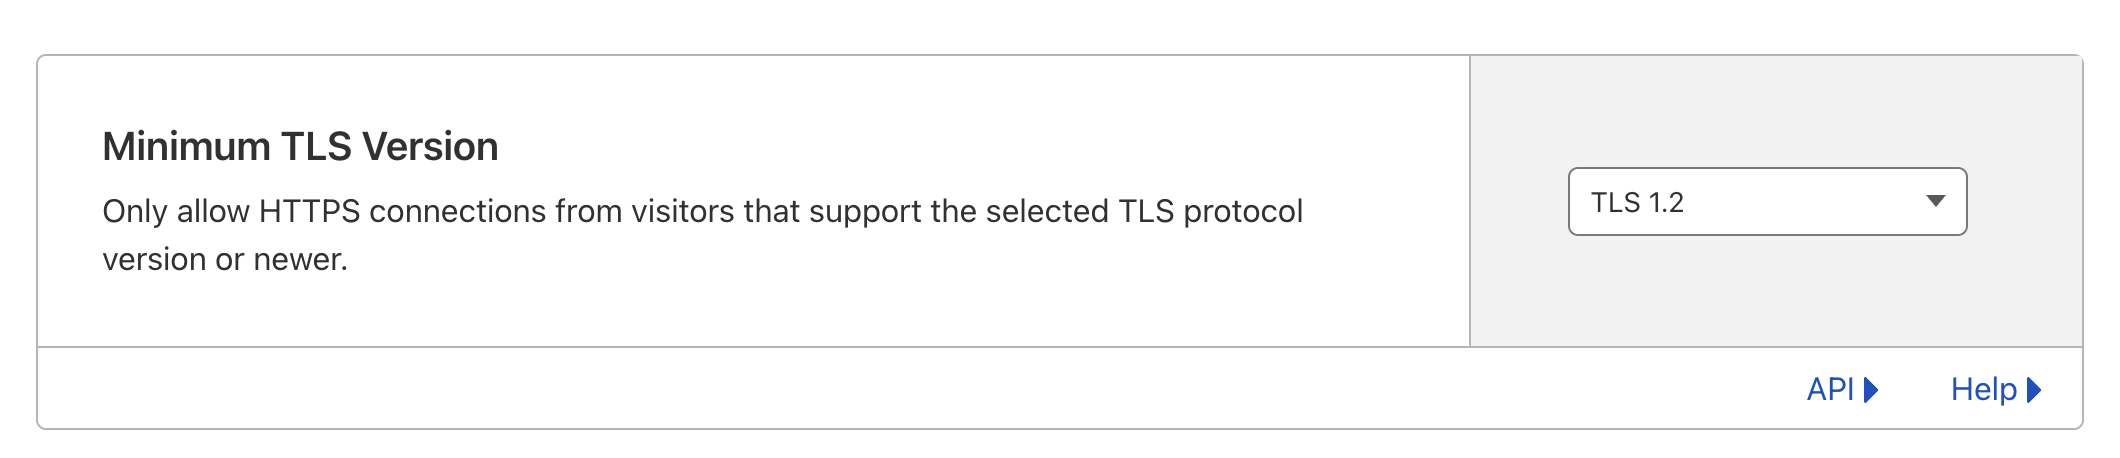
Be sure to also turn on this option:
2. Upgrade your Cloudflare Free plan to a Cloudflare Pro plan
Be sure to check out our article on how to add Cloudflare to your (WordPress) site if you’ve not yet added Cloudflare to your site.