The Apache web server stores its logs in the ~/logs directory, which is located in your environment’s root directory when you log in via SSH or SFTP. For information on the different types of log files and where to locate them on your Servebolt environment, visit our log file explanation article.
This guide provides an overview of using the Servebolt Optimizer plugin and useful Linux commands for viewing and analysing log files, such as AccessLog and ErrorLog. For more advanced command-line options or tasks related to WordPress, please see our article on WP-CLI commands.
Viewing Logs with Servebolt Optimizer Plugin

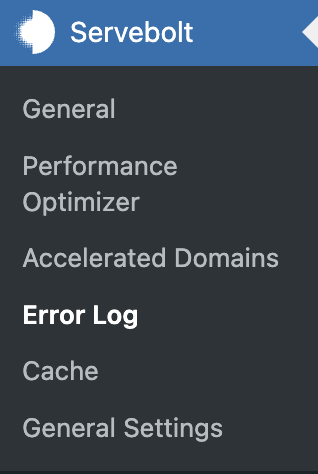
The Servebolt Optimizer plugin provides an easy way to access and view the ErrorLog directly from the WordPress dashboard. To view the ErrorLog, navigate to the ‘Error Log’ tab within the plugin, as shown in the example to the left.
Using Command Line Interface (CLI) to View Log Files
For users with CLI experience, accessing log files via SSH can be a more flexible and powerful option. Below are some commonly used commands to view log files:
cat
cat [filename]
Prints the content of a file to the console in the directory you are in, for example:
cat ~/logs/AccessLog
cat ~/logs/ErrorLog
For more usage information, run: cat --help
zcat
zcat [filename]
Prints the content of the gzip file to the console in the directory you are in, for example:
zcat ~/logs/AccessLog-20211201.gz
zcat ~/logs/ErrorLog-20211201.gz
For more usage information, run: zcat --help
tail -f
tail -f [filename]
Continuously prints the end of a file to the console in your directory in real-time. For example:
tail -f ~/logs/
Another example is when you want to display log entries in real-time but only for files ending with “Log”, you can add the argument /*Log:
tail -f ~/logs/*Log
You can also specify AccessLog or ErrorLog to be followed in real-time, for example:
tail -f ~/logs/AccessLog
tail -f ~/logs/ErrorLog
For more usage information, run: tail --help
grep
In the coming examples, we use a pipe: | in combination with the commands. Doing so allows you to pass the output of one command directly as input to another.
grep ‘word’ [filename]
Prints the lines that match the given string in the specified file. For example:
grep 'string' AccessLog
grep 'string' ErrorLog
Grep is useful when searching for strings within the specified file, as it prints the matching lines. Here’s an example where we search for status codes of 200 in the AccessLog:
cat ~/logs/AccessLog | grep " 200 "
We can also use grep in real-time with the same example by combining it with the tail command:
tail -f ~/logs/AccessLog | grep " 200 "
For more usage information, run: grep --help
wc -l
In the coming examples, we use a pipe: | in combination with the commands. Doing so allows you to pass the output of one command directly as input to another.
wc -l [filename]
Counts and prints the number of lines present in the specified file. The wc stands for “word count”, and the -l option specifies that you want to count the lines.
Combining the wc -l and grep commands will display the number of lines that match the specified search. For example, when searching for status codes of 200 in the AccessLog and printing the number of lines that match the search:
cat ~/logs/AccessLog | grep " 200 " | wc -l
For more usage information, run: wc --help
As always, should you have any additional questions, please don’t hesitate to contact us through our support chat at servebolt.com!
