In this tutorial, you will learn how to set up HTML caching in Cloudflare using Cache Rules for your WordPress website. By leveraging Cloudflare’s edge servers to serve cached HTML content, you’ll speed up page delivery and reduce server load, thereby optimising your site’s performance and scalability efficiently. However, setting up HTML caching requires careful configuration to avoid caching dynamic content.

Prerequisites
To follow along with this tutorial, you’ll need the following:
- An active Cloudflare zone for the domain you want to enable HTML caching on. If you don’t have one already, you can contact Servebolt Support via our chat, and we can set one up for you!
- A basic understanding of how caching works
Disclaimer
Some plugins, like our Servebolt Optimizer, can affect the HTTP caching headers and potentially influence Cloudflare’s behaviour. To resolve this, you will need to set the correct cache headers within Servebolt Optimizer. This can be done by running this command from your site root directory:
wp servebolt html-cache activateBefore We Get Started
Cache Rules
Cache Rules in Cloudflare are configurations that allow you to customise how content is cached and served from Cloudflare’s edge servers. These rules enable you to specify which content should be cached, for how long, and under what conditions.
Order of Cache Rules
Cache Rules in Cloudflare control how content is stored and delivered. The order in which these rules are applied is crucial:
- Sequential Evaluation: Rules are checked one by one. The last rule that matches takes priority.
- Stackable Rules: Multiple rules can affect the same URL by combining their settings.
- Handling Conflicts: When rules conflict (e.g., cache vs. bypass), Cloudflare follows the settings of the last matched rule.
For more detailed examples, check Cloudflare’s guide on Cache Rule Order.
Predefined Cache Rules
Each Cache Rule explained below comes with predefined Cache Rules created by Servebolt.
It is important to be cautious when copying predefined cache rules as they are not guaranteed to work as expected for all WordPress websites. It is crucial to be cautious to ensure that caching optimisations align with your site’s unique functionalities and user interactions. By reviewing and tailoring Cache Rules to your own content, you can exclude critical pages (like login-, cart- or checkout pages) and cookies that shouldn’t be cached.
If you want to use the Cache Rules we have created, you can copy the “Expression Preview” in each step and paste them into the “Edit expression” section in Cloudflare when you make a Cache Rule.

How to Enable HTML Caching for WordPress in Cloudflare
To enable HTML caching, we’ll use Cloudflare’s Cache Rules. These rules allow us to specify what content to cache and what to exclude.
Firstly, head over to the Cloudflare dashboard and navigate to the Cache Rules section.
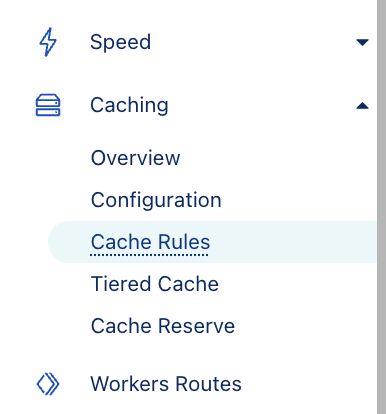
From here, you will be able to see any existing Cache Rules or create new ones.
Exclude Pages That Shouldn’t be Cached
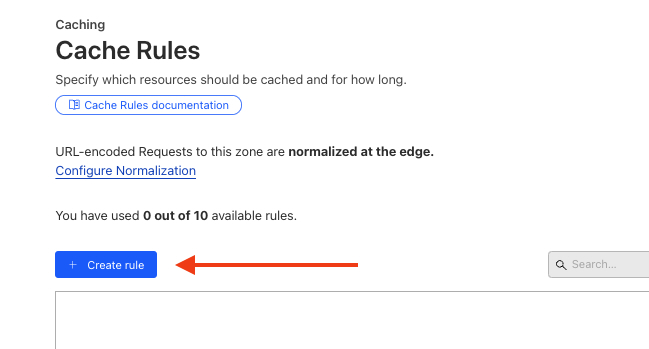
To create the first Cache Rule, click the “Create rule” button in Cloudflare.
In this Cache Rule, we tell Cloudflare what not to cache, such as WordPress login pages, account pages, checkout, cart, and other cookies that shouldn’t be cached in a WordPress/WooCommerce setup.
Please keep in mind that if you have paths or cookies for your website that you know you don’t want to cache, this is where you set them.
Expression Preview
(starts_with(http.request.uri.path, "/wp-admin")) or
(http.request.full_uri contains "/wp-login.php") or
(http.request.full_uri contains "/checkout") or
(http.request.full_uri contains "/kasse") or
(http.request.full_uri contains "/cart") or
(http.request.full_uri contains "/handlekurv") or
(http.request.full_uri contains "/my-account") or
(http.request.full_uri contains ".txt") or
(http.request.full_uri contains ".xlst") or
(http.request.full_uri contains ".xml") or
(http.cookie contains "no_cache") or
(http.cookie contains "wp-") or
(http.cookie contains "wordpress-") or
(http.cookie contains "comment_") or
(http.cookie contains "woocommerce_") or
(http.cookie contains "PHPSESSID") or
(starts_with(http.request.full_uri, "/graphql")) or
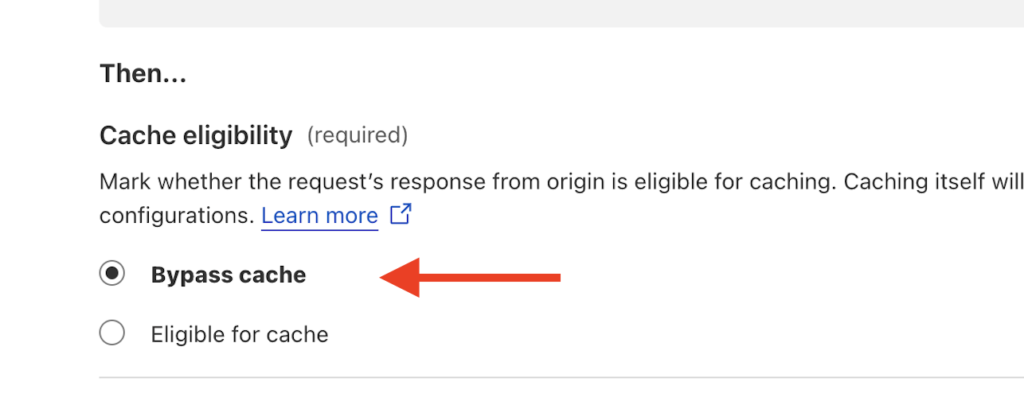
(starts_with(http.request.full_uri, "/xmlrpc.php"))When you set the Cache Rules for your website, you must also tell the rule to Bypass cache before deploying. This is very important as we don’t want these rules to be cached.
Cache Everything for This Domain
Lastly, in this rule, you instruct Cloudflare to apply the caching behaviour (such as caching HTML content) to all pages under the specified domain. This means that any request to “yourdomain.com” will follow the caching rules you have defined, ensuring consistent caching behaviour across your entire site.
Expression Preview
(http.host contains "yourdomain.com")When you have added the domain needed to the rule, you also need to make the rule Eligible for cache before deploying.

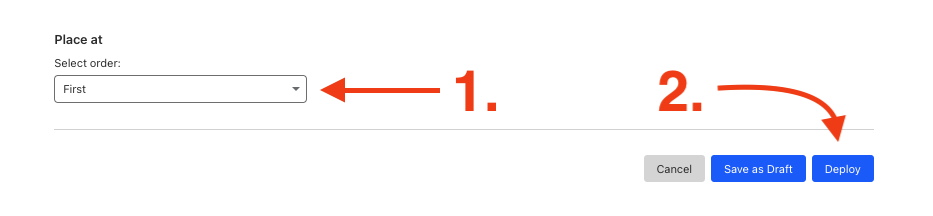
Before deploying, set the Cache Rule first rule in order. This ensures that Cloudflare applies this rule first, so your content is cached effectively.
Your Cache Rules should now look like this in this order:

Verification
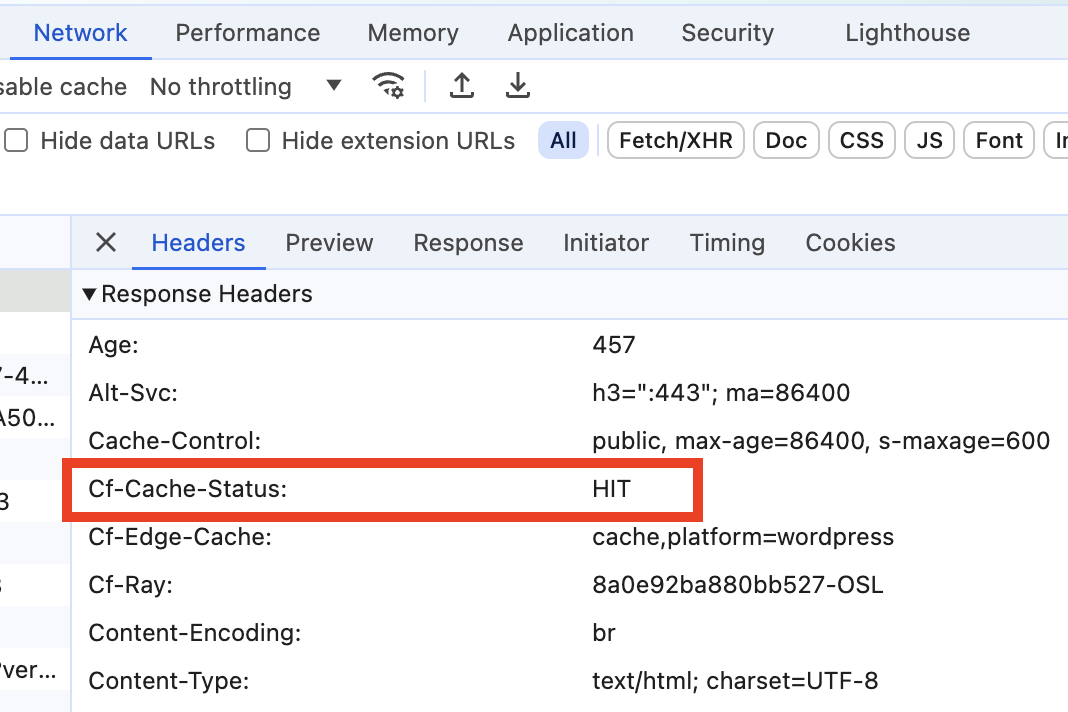
After implementing the necessary Cache Rules, verifying that the caching is working correctly is important. You can do this by checking your website’s cache headers. You specifically want to look for the Cf-Cache-Status response header.
The Cf-Cache-Status header provides information about the status of the content being served from Cloudflare’s cache. Here’s what the various statuses mean:
- HIT: The content was found in Cloudflare’s cache and served from there, which means it did not need to be fetched from the origin server.
- MISS: The content was not found in the cache, so Cloudflare fetched it from the origin server and may store it in the cache for future requests.
- DYNAMIC: This status indicates that the content is dynamic and is not cacheable by Cloudflare. This typically applies to user-specific content such as /wp-admin/, personalised data or real-time information. In this case, Cloudflare will always fetch the content from the origin server instead of serving it from the cache.
Conclusion
By following this tutorial, you’ve successfully set up HTML caching for your WordPress site using Cloudflare. This optimisation will enhance your site’s speed and scalability. Remember to tailor Cache Rules to avoid caching dynamic content for the best user experience.
After setting up the Cache Rules, we can verify the cache status using the Cf-Cache-Status response header to ensure your configuration works correctly.
For further information on caching strategies and when to purge cache, be sure to read our article.
And as always, should you have any additional questions please don’t hesitate to contact our support chat at servebolt.com!