Errors happen on any web development platform and can occur at any time and after any new update. Errors are inevitable, but knowing how to debug them can save a lot of precious troubleshooting time. Just like any software application, WordPress also comes with WordPress-specific logs that are built-in as a debugging mechanism to help you identify the issues efficiently.
In this article, you will learn how to do WordPress error logging through two different methods. There are also more logs that can be useful, like the Apache/PHP Access and Error logs.
Table of contents
Why Do You Need WordPress Error Logs?
Practically speaking, there is not a single piece of software that is 100% error-proof and WordPress is no different. WordPress.org is an open-source platform that is maintained and developed by thousands of independent developers across the globe. Due to its open-source nature, the code that is shipped to the end-user in the shape of a plugin or a theme is not always of the best quality and is prone to create compatibility issues and errors of sorts.
Enabling WordPress error logs can help you identify these errors as quickly as possible so you can troubleshoot the problem effectively. Although there are plugins available that scan these errors and display them right inside the WordPress dashboard, nothing beats the accuracy and precision of native WordPress error logging.
WordPress error logs are saved in a single file (named debug.log in the wp-content/ folder) that contains information such as timestamps, error details, and the source location that is vital for troubleshooting the error.
Let’s see how WordPress error logs can be enabled using two methods.
How to Enable WordPress Error Logging?
There are two ways to enable WordPress error logging.
Method One: Via FTP
In this method, you will need access to your WordPress files as we need to make changes inside the wp-config.php file. You may use any File Transfer Protocol (FTP) to access your web files. I will be using FileZilla in this example, which is free and easy to use.
After downloading and installing FileZilla, open the application, and enter your server’s credentials. You will require a Hostname, Username, Password, and in some cases, Port to connect FileZilla with your server.
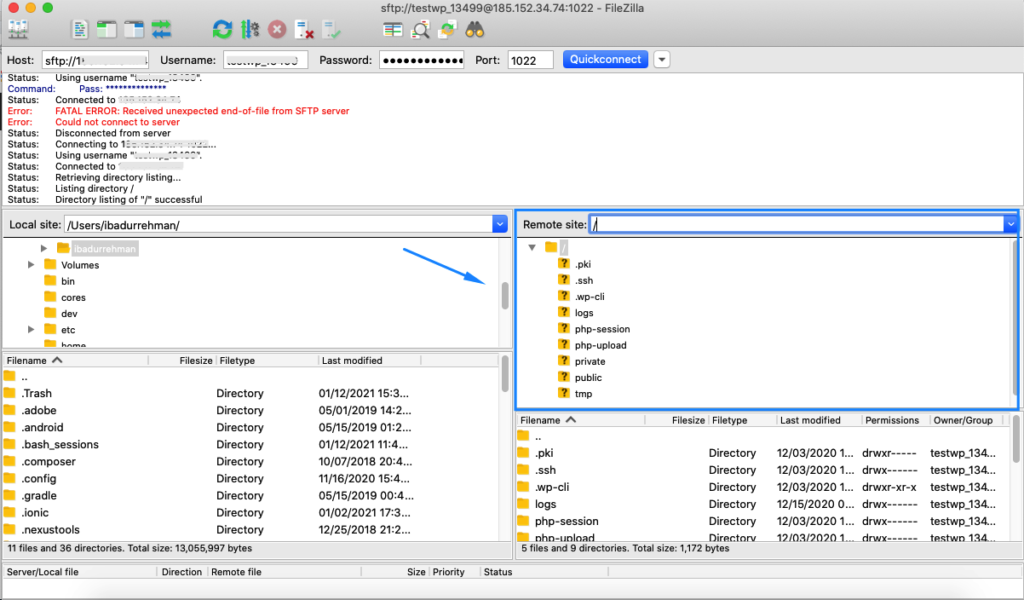
Once connected, you will notice that the folders are populated inside the right section under “Remote Sites”. You need to locate the root folder in order to access the wp-config.php file.
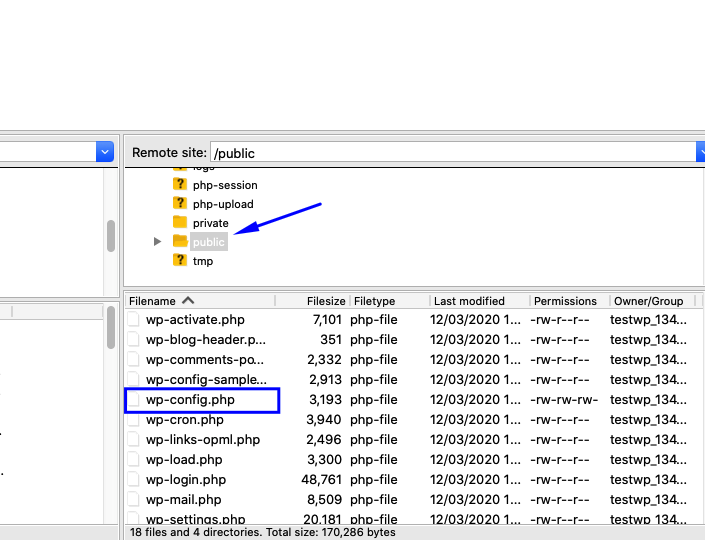
For me, it was under the public folder. Right-click on the file and click on the View/Edit option. This will open the file inside a text editor.
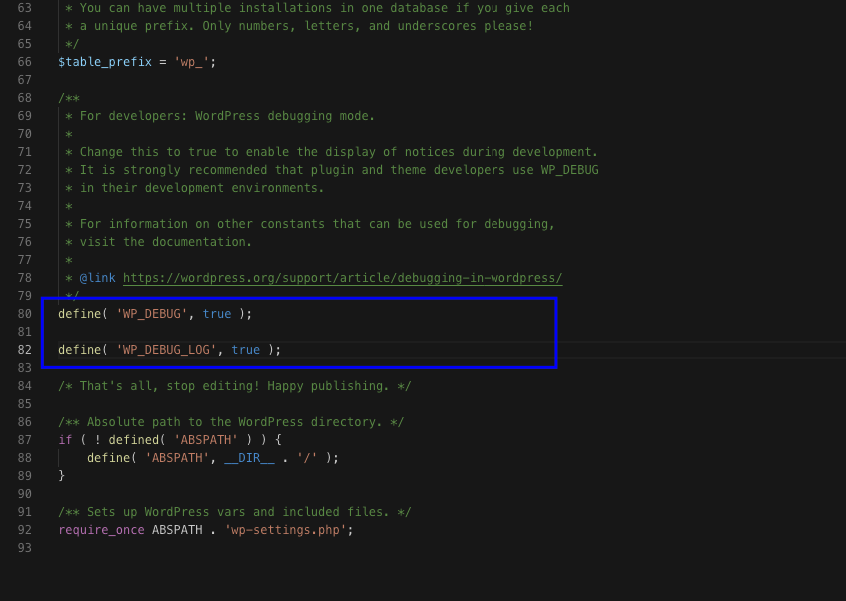
Once the file is opened, scroll all the way down till you see the following line of code:
define( 'WP_DEBUG', false );
Simply, change it to:
define( 'WP_DEBUG', true );
The true parameter will activate the debugging mode inside of your WordPress application.
Also, add the wp_debug_log below to start logging the errors.
define( 'WP_DEBUG_LOG', true );
Note: If you can not locate the above line of code then simply add it like.
Next, save the changes and upload the wp-config.php file back to your server using FileZilla. Make sure that you upload the file to the exact same location.
To track the errors, head over to the wp-content folder, and inside that, you will now see a new file debug.log.
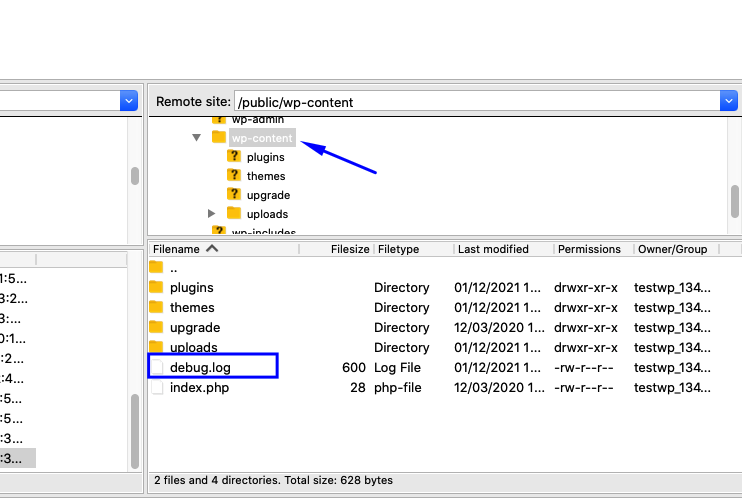
Right-click on the file to open it inside your favorite text editor for viewing.

I have one warning and one fatal error that I need to fix as soon as possible. At this point, I can either go straight to the location where the problem exists and fix it by myself or ask another expert to do the troubleshooting for me without wasting time guessing the error.
Method Two: Via WP-CLI
WP-CLI is a great tool that is also helpful in debugging errors. In case you do not have the option of accessing web files using FTP, you can still activate WordPress logs using WP-CLI. To do so, you must have the WordPress CLI installed (see below for the install process).
If you are a Servebolt customer then you do not need to install it as it comes pre-installed on all our servers.
The rest of you can install the CLI by running the following commands inside their terminal.curl -O https://raw.githubusercontent.com/wp-cli/builds/gh-pages/phar/wp-cli.pharThis will fetch the wp-cli.phar file. Next, verify if the Phar file works.php wp-cli.phar --infoAnd finally run the following command to make the CLI executable.chmod +x wp-cli.phar sudo mv wp-cli.phar /usr/local/bin/wp
Once the WP-CLI is ready to use. Access your server through SSH and again go to your website’s root directory to check if the debugging mode is enabled (true) or disabled (false).
wp config list WP_DEBUG
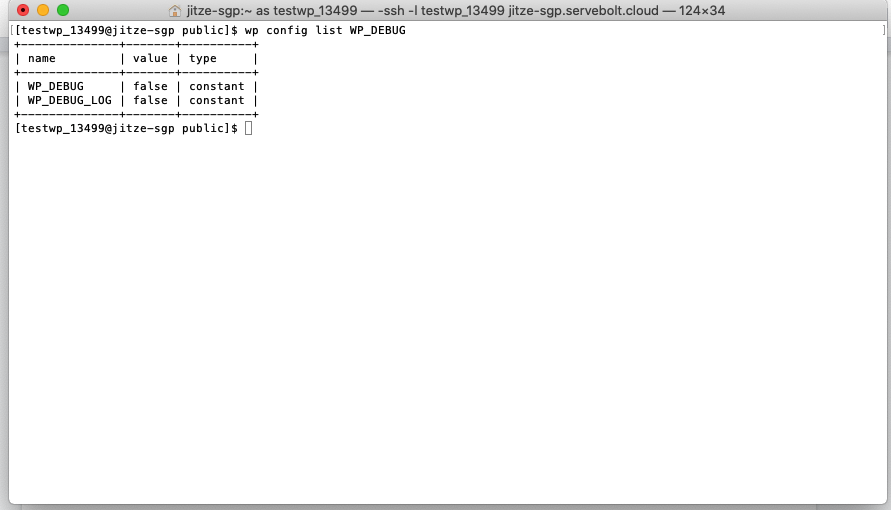
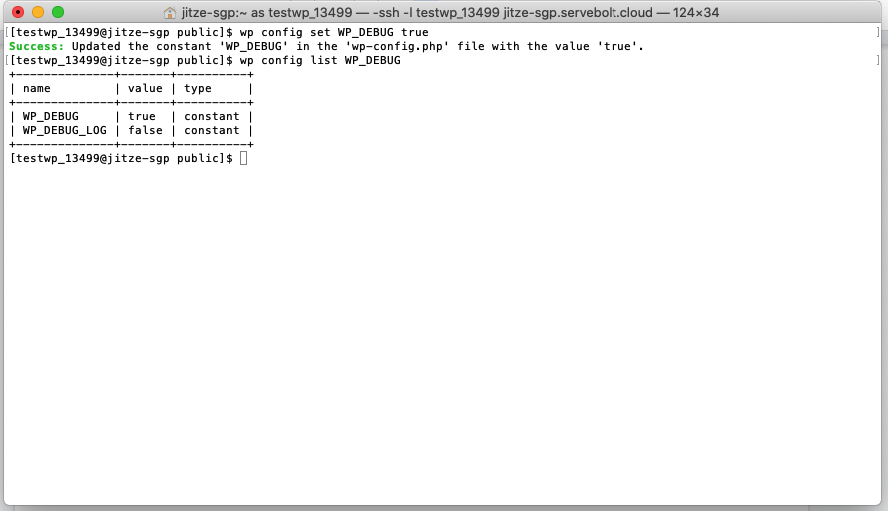
Since we have not yet activated the WordPress error log and the WordPress debug log, the values inside the table are false. Let’s enable them by running the following commands inside the terminal.
First: wp config set WP_DEBUG true
Then, wp config set WP_DEBUG_LOG true
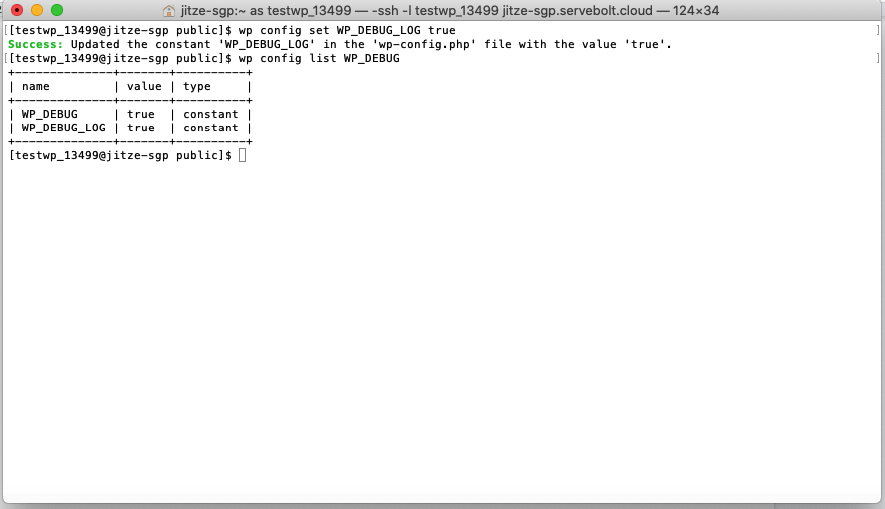
That’s it! It took me just a couple of minutes to enable both the WordPress error logs and debug logs using WP-CLI. This method is more convenient than the FTP method, as it only requires running two commands inside the SSH terminal.
Now that you know how to capture WordPress logs. The next step is to use these logs to troubleshoot the errors. You may or may not be familiar with the errors presented inside the logs, therefore, it is vital to know the helpful resources where other experts can help you do so. There is no standard recipe for troubleshooting any specific error. But a specific error in the WordPress error logs can definitely put you in the right direction.
Some of the resources that can help you solve the problem behind the error – and that I personally visit and recommend as well – are:
Be sure to search for the error you see in the logs without any site-specific information!
Wrapping Up!
If you’re done with testing, set the WP_DEBUG setting back to false as keeping it on a performance hit you’ll want to keep for a limited time as much as possible.
Today we learned how to enable debugging mode inside WordPress to catch those nasty bugs. WordPress error logs do not only provide relevant and accurate information but are also convenient and do not require adding any third-party plugins. Try any of the above methods to enable WordPress error logging and share your experience in the comments below.