Introduction
There are many ways to push changes you’ve done on one site to another. The most rudimentary way would be to download all files and the database as a backup, and then upload them to your production environment. Luckily we’ve made that quite simple with a one-time script, named sitecopy!
This presumes you know how to use SSH and terminal commands. If you need a refresher on using SSH, then we have some help articles in our help center.
What sitecopy does
What sitecopy does is first fetch all files from your staging site and update your config file. After it’ll make a database dump and import it to your production site’s database. Remember that sitecopy does exactly what the name entails, it will make a carbon copy of your staging site. This means that directories and files that don’t exist on stage but exist in production will be deleted. So be sure that staging corresponds to the setup of your production environment. If you’re not sure about this we do recommend you to make a backup beforehand.
Time needed: 15 minutes
- Log into the production site with SSH
Either you use PuTTY with Windows or the terminal for Mac and Linux, you first need to log into the server via SSH like this:
ssh [PRODUCTION-USER]@[SERVER]
You’ll find the SSH login string in the Server Login Information on the site in your Bolt.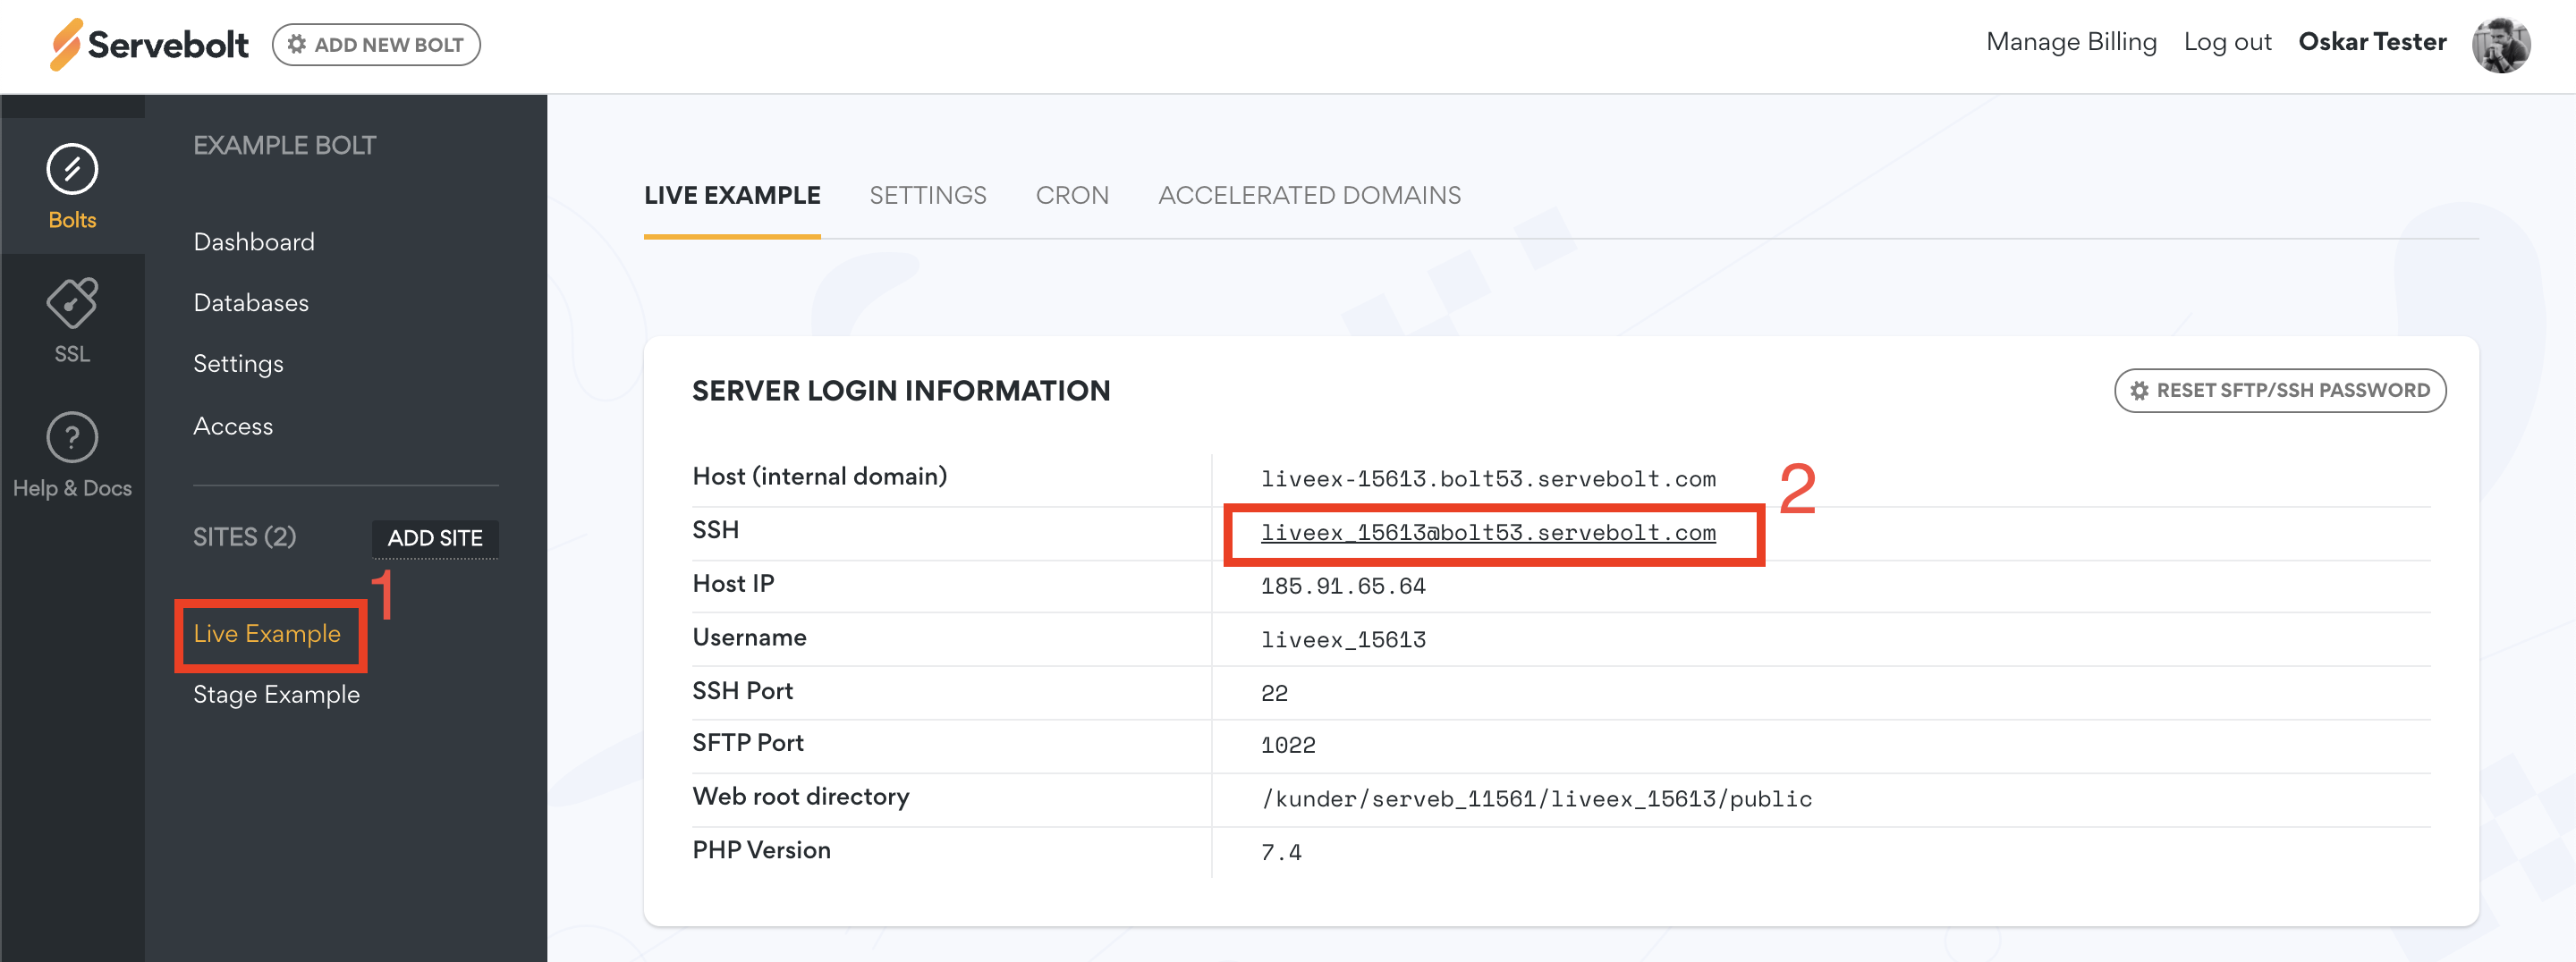
- Get your SSH public key
If you haven’t generated a SSH key pair before then you’ll have to run this command: ssh-keygen and press enter three times until you’re through, or you can follow this step-by-step guide. When generated, the key is saved by default as ~/.ssh/id_rsa.pub. The next step is to copy that key somewhere so we can use it in step #4.

- Have your production site’s database credentials ready
Have you not written down or you’re simply not sure what your production site’s database credentials are, then the simplest method is to check your config file. By default, it’s found in
~/public/wp-config.phpfor WordPress. Other CMSs’ or setups will likely have another path and filename for their config file. An example of DB credentials is found in thewp-config.php: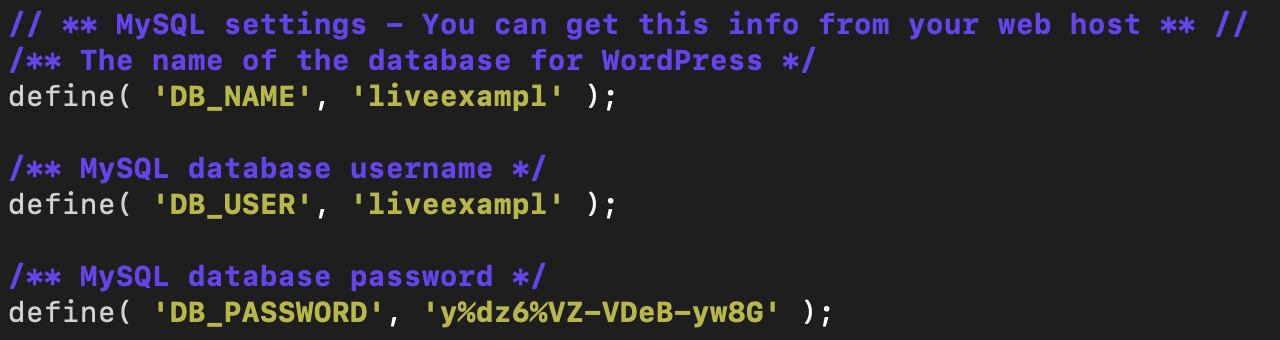
- Save the public key in staging
Open a new terminal window and log into the staging site:
ssh [STAGE-USER]@[SERVER]. There you’ll need to paste the public SSH key into a new file calledauthorized_keysin the~/sshfolder. When finished you can exit out of this window, but keep the staging SSH login string in mind. To make and edit that file run this command:nano ~/.ssh/authorized_keys - Run sitecopy from production
Back in the terminal window for your production site, you can now run sitecopy. Be sure to have your staging site’s SSH login and production site’s DB credentials ready. Under you’ll see how to format the command:
sitecopy -t [CMS] [STAGE-USER]@[SERVER] [PRODUCTION-DATABASE]
It’ll prompt you for which database you’d like to import to. There’s no need to specify the DB again, just click enter two times. Lastly, it’ll prompt you for the DB password, paste it in and click enter. The script will take care of the rest
When the script finishes, you’re done!
And as always, should you have any questions or need any additional help you can contact our support chat at servebolt.com!