In this article, we’ll do a step-by-step on how you can connect to your site via SFTP. This suspects you have some knowledge of how your FTP program works. Though in this article we will show a step-by-step using FileZilla as our software of choice. However, should you need more of a tutorial on how to use FileZilla you can check out their help article here.
Time needed: 5 minutes
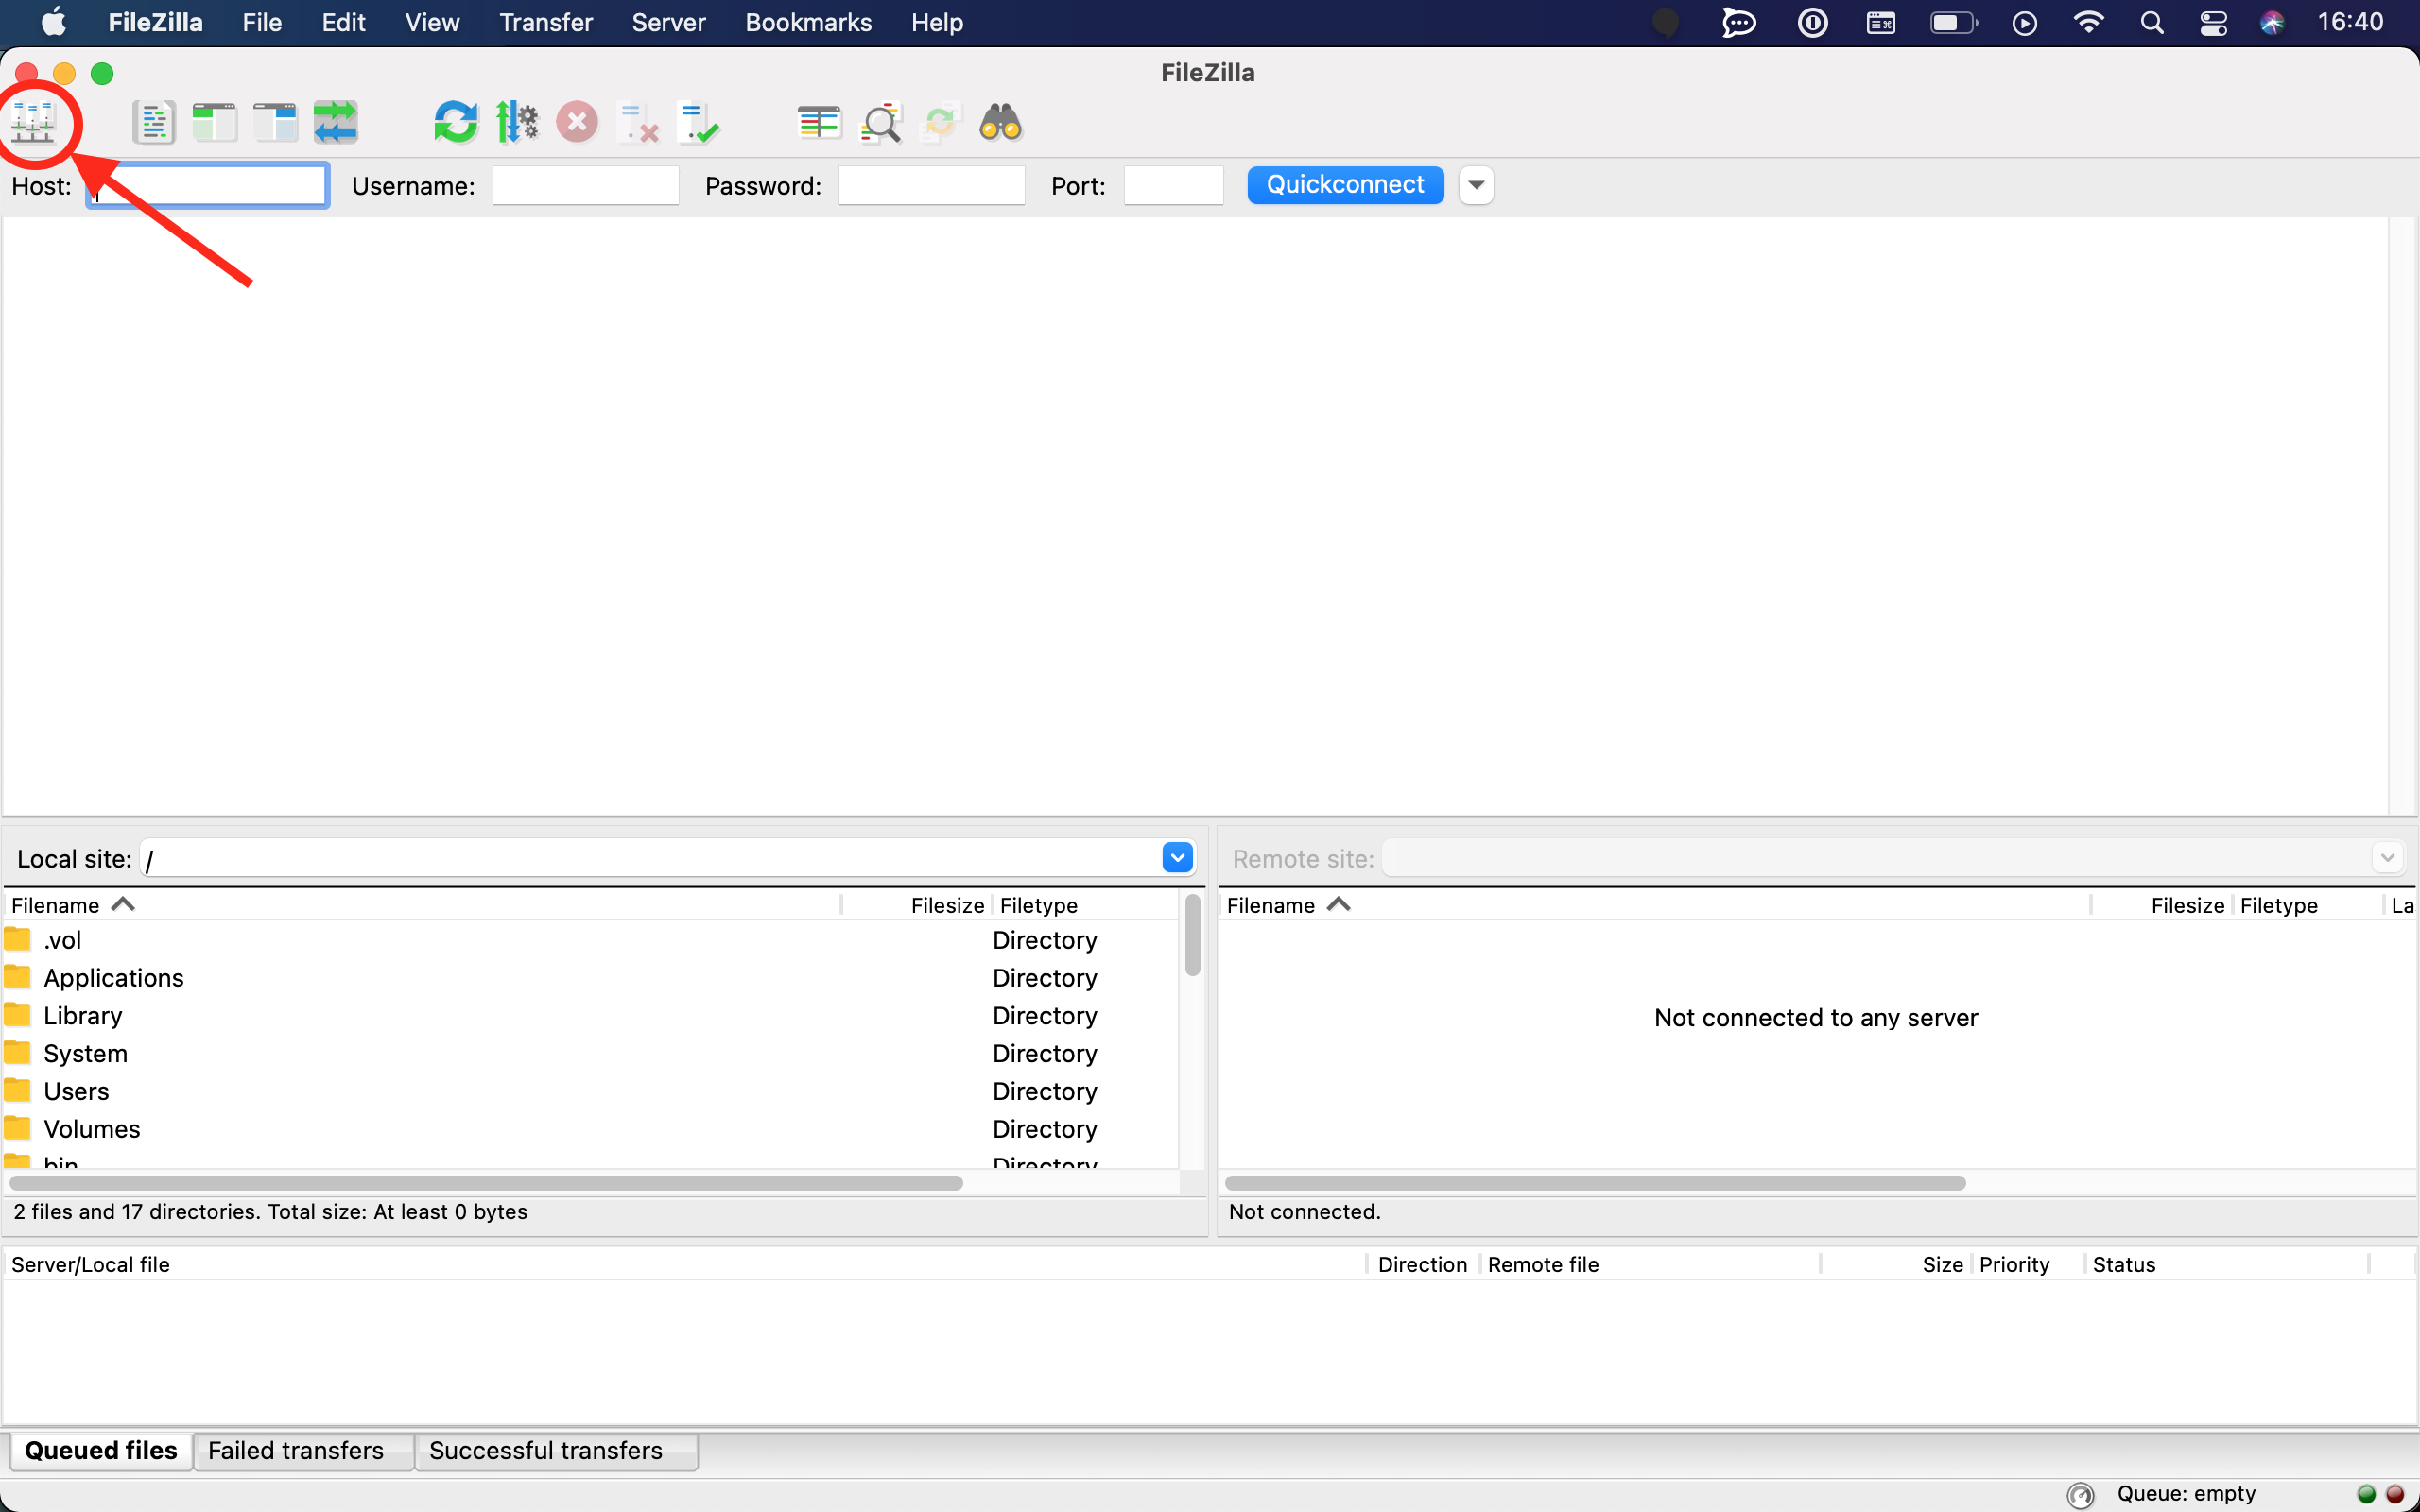
- Open the connection interface
Depending on your software it might be different methods of connecting. In FileZilla we will use the Site Manager which is the left most icon in the top bar.
- Make a new site
In the Site Manager, you will need to make a new site by clicking the button by the same name in the bottom-left menu.

- Get your credentials ready
Your credentials will show in our control panel the first time you make a new site.
If those where not saved then your credentials can be found under the SERVER LOGIN INFORMATION section of your site. Here you will not see the password but that can easily be changed with the RESET SFTP/SSH PASSWORD button in the top-right corner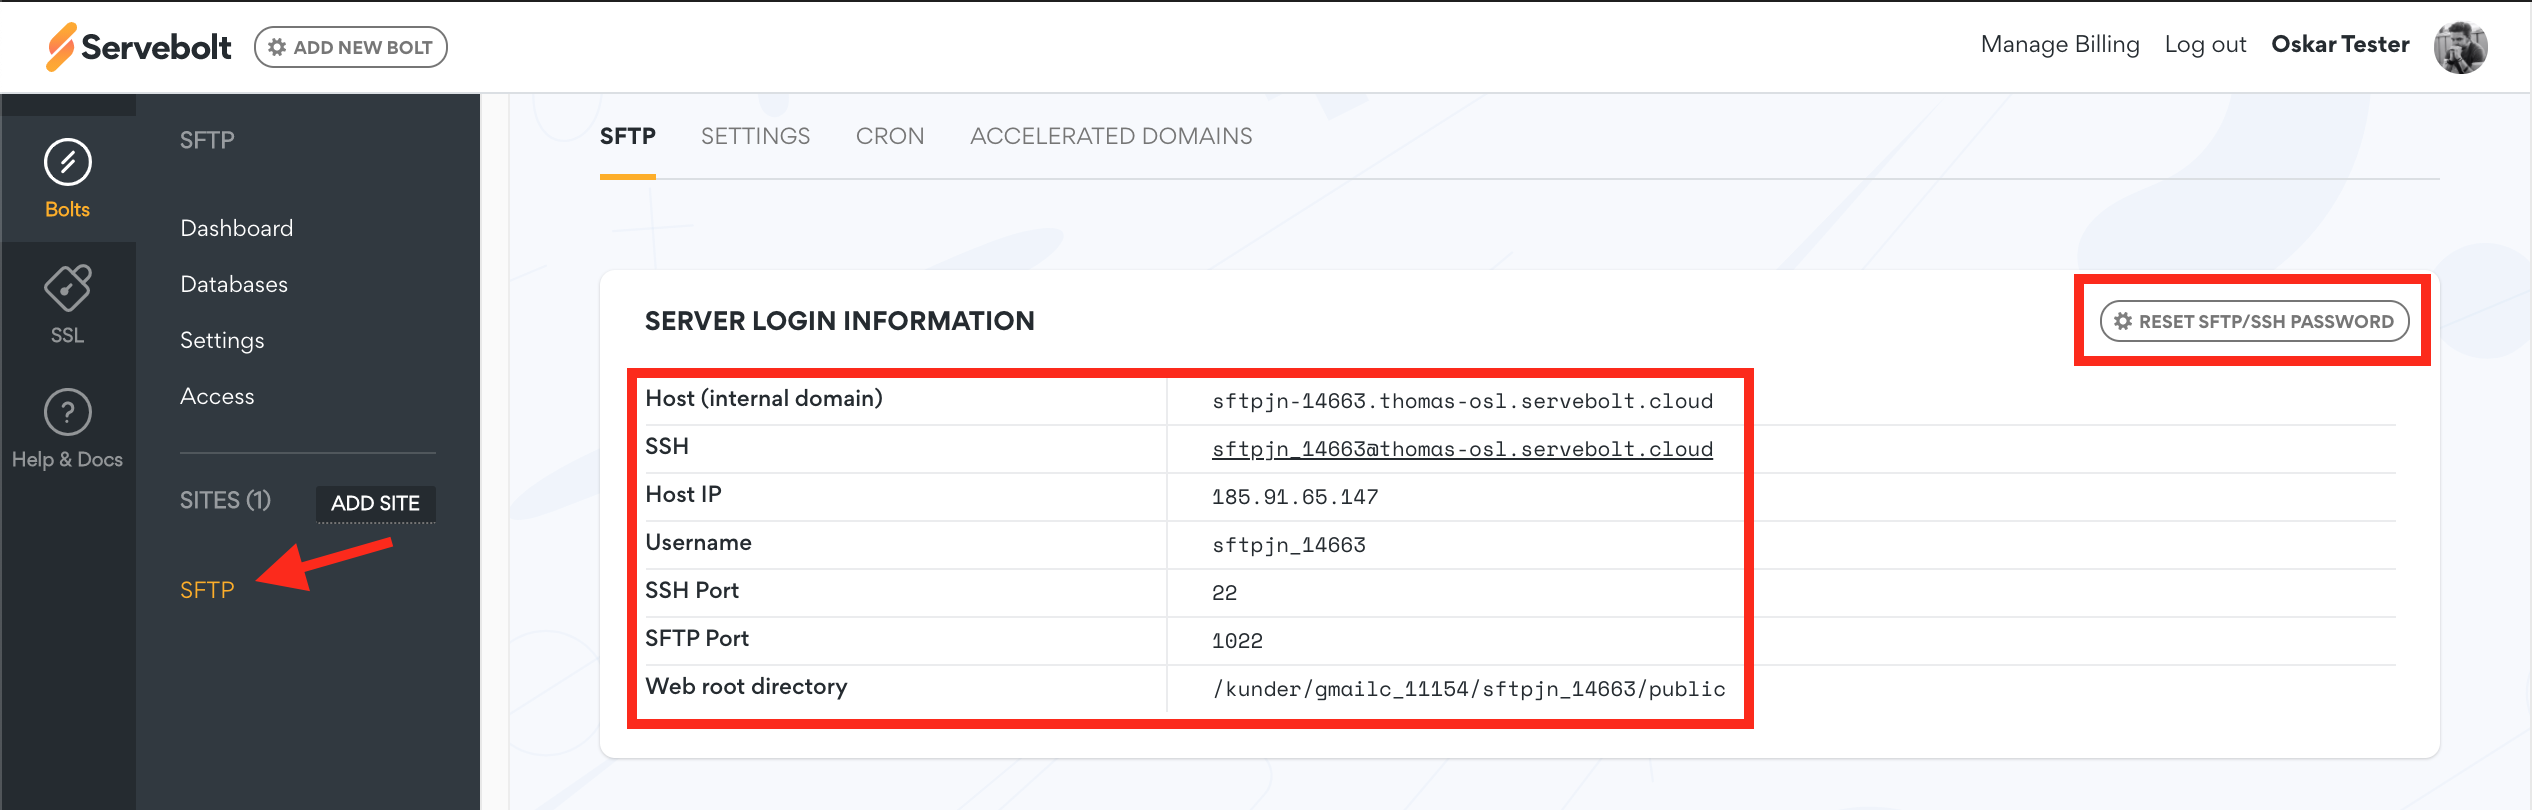 As shown in the image the important credentials for my instance is:
Host IP:sftp://185.91.65.147
Username:sftpjn_14663
Password:************(this will not show, you will need to reset it if not saved)
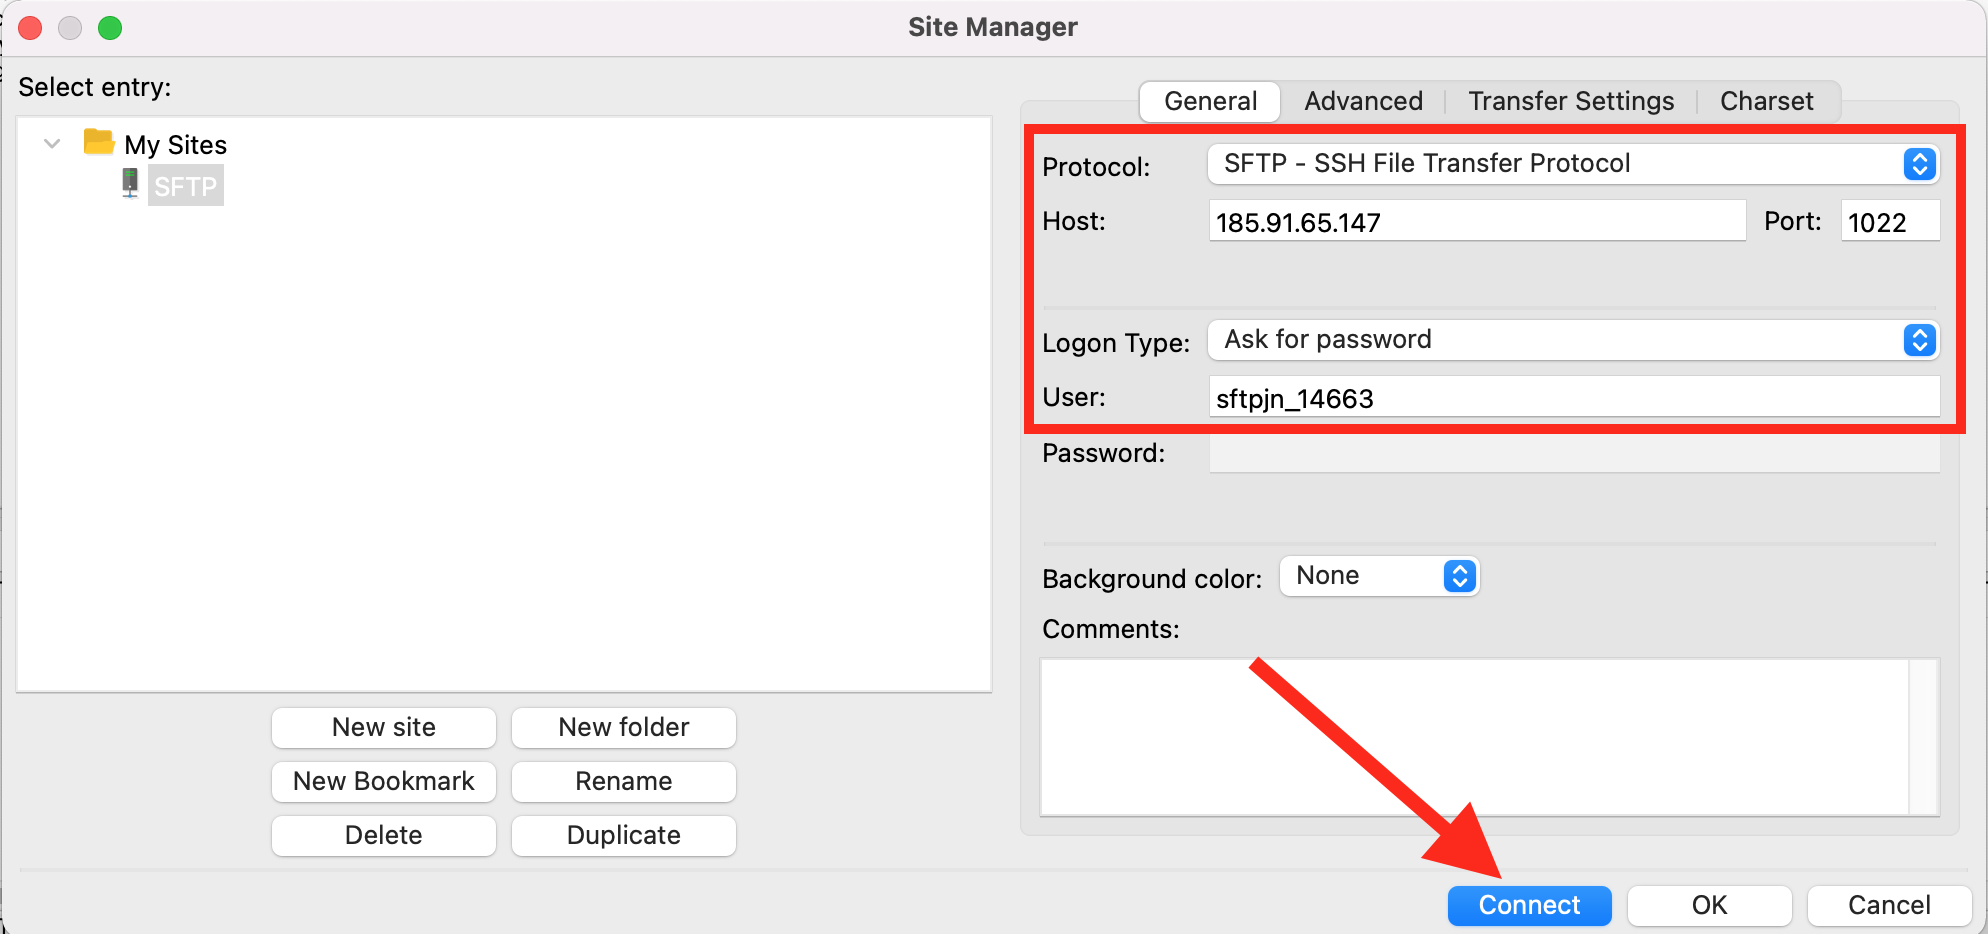
SFTP Port:1022 - Enter your credentials
Back in FileZilla’s Site Manager you will first need to choose SFTP as the protocol. Thereafter you can enter your host, port, username and click connect.
- Connect!
A prompt will pop up asking for the password, enter it and click OK. If done correctly you should see something like this
