Images are more often than not a big part of websites and large image files can often lead to slower loading times and that’s something we aim to avoid. At Servebolt we are experts in image management and optimization, and in the following article we will explain our different optimization options and how to use them within a WordPress installation.
With Accelerated Domains
Our Image Resize add-on in Accelerated Domains solves this problem of image optimizations in the best way possible, look here under “Add-ons & Compatibility”. This can be enabled using the checkbox inside the Accelerated Domains setting in the plugin:
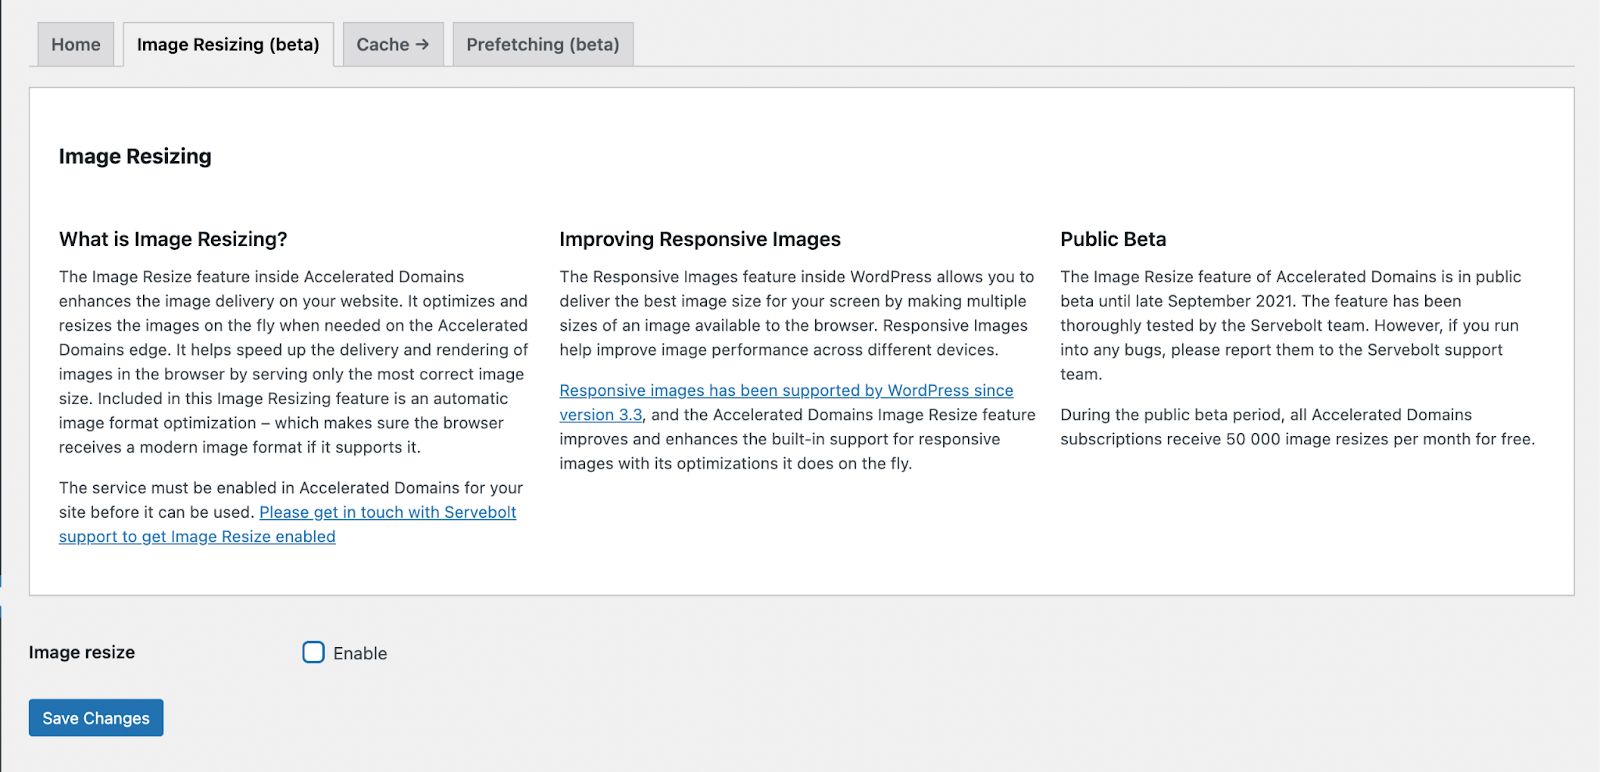
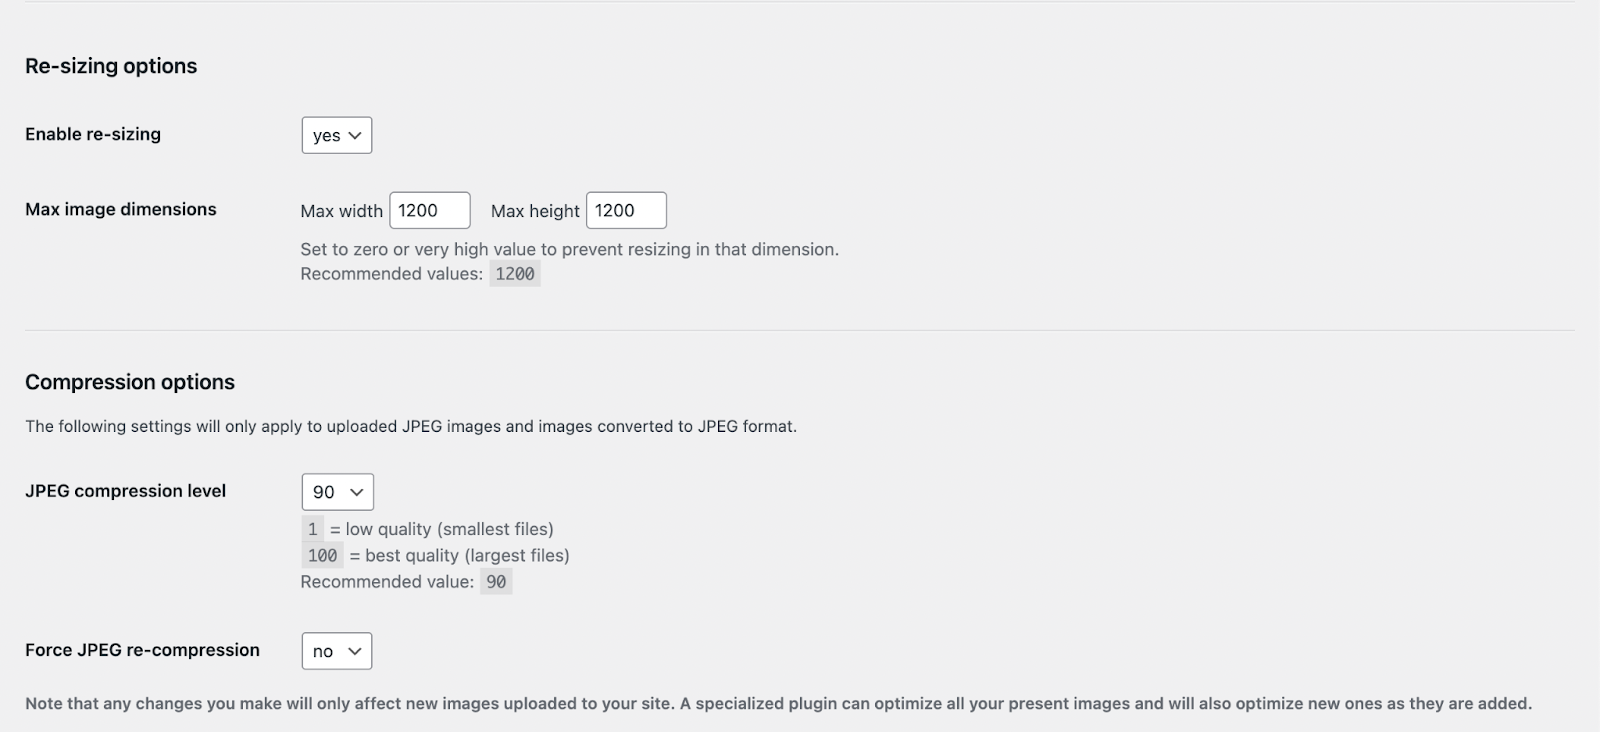
Enabling the feature will show you the available options in the Image Resize add-on, see our documentation for more info:

Image resizing via Cloudflare
Image Resizing in Cloudflare requires a paid Cloudflare subscription to be available. You can resize, adjust quality, and convert images to WebP format, on demand. Cloudflare caches every derived image at the edge, so you store only the original image.
Please note that this feature is available as an “addon”, and is not something Servebolt supports, but you can of course add this yourself to your privately managed Cloudflare account. Keep in mind that this can add to your price.
Servebolt does however support image resizing on the fly with Accelerated Domains.
If you have questions about setting up a Cloudflare account provided by us, you can reach out to the Support Team via our chat and we’ll happily set one up for you.
Image resizing in the command line
Few websites, if any, require images that are larger than “full high-definition/HD”, or 1920 x 1080 pixels (source: StatCounter Global Stats). Full HD images can be aligned both horizontally and vertically, so it’s a good idea to set max width/height to 1920 x 1920 pixels. This can be done by logging to your server via SSH, navigate to your website home directory and use this command:
find . -iname ‘*.jpg’ -print0 | xargs -0 -n 1 mogrify -resize ‘1920×1920>’
To limit the upload of larger images we recommend using the WordPress plugin Resize image after upload. This is particularly true with websites where visitors/users can upload images themselves.
Just install/activate this plugin and in the settings for the plugin, set the desired max width and max height of your images. Note that we don’t recommend using the compression features of this plugin.
Script for image compression
We like to practice what we preach and when compressing website images, we use server software jpegoptim and optipng, on which you can read more about here.
We actually have a setup of commands that we run, which not only does a really good compression, but when we run them repeatedly, they only compress previously uncompressed images.
If you read our feature article on How to optimize for faster images in WordPress, you can find our script for image optimization there under “Script for image compression”
Why not use image optimization plugins?
The primary reason for not using a plugin is that it can slow down your website and/or web server. It is really a waste of resources to use image compression plugins. They do almost the same thing as the server-side software previously mentioned, but through the web server and WordPress. Because of this extra overhead that needs to be loaded on each request it’s inefficient doing it this way. Another side-effect of this is that most image optimization plugins increase the TTFB of your website. And some plugins also offer different features depending on your hosting provider.
The plugin mentioned in this article (in addition to our own plugin) is one that handles the image optimization on already uploaded images. The other methods of optimization mentioned are primarily meant to process large amounts of images in bulk, after they have been uploaded to the site/server. How you decide to do this is of course all about preference, and you can always get in touch with our Support team if you have any further questions.