Whenever you want to copy a site to another instance in our system, the best way is to use our built-in sitecopy script. Sitecopy helps you copy all your files + database and sets up your config file in one go based on the CMS you’re using.
Table of contents
In this tutorial, we will go over everything from A to Z in regard to the sitecopy command. We will learn how to set up a new site instance, how to set up a SSH keypair, extract the needed credentials from our Control Panel, and finally how to use sitecopy. The only thing expected from this article is that you know how to use SSH and common terminal commands.
I will also refer to your current site, the site you want to copy files and database FROM as your “old site”. I’ll refer to the site you want to copy these files and database to as your “new site”.
You will see I use these two example sites
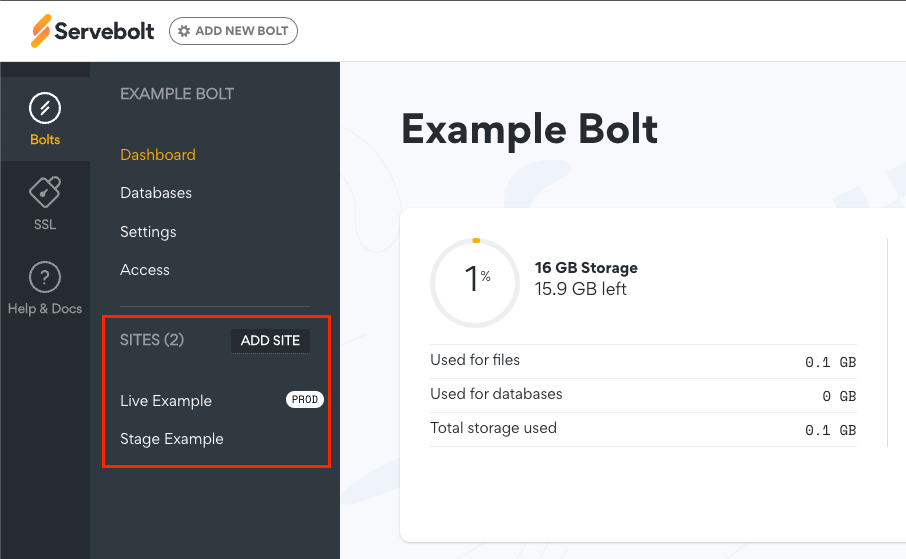
How to add a new site
The very first thing we need to do is to make your new site. This is done via the Add Site button in the Control Panel in your Bolt.
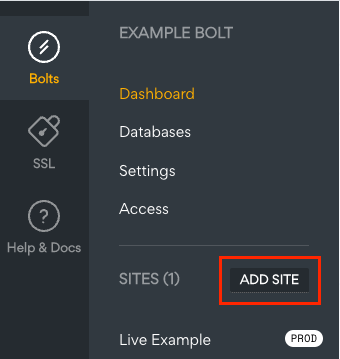
You will see a new screen where you can name the new site. We’ll call it Stage Example here. After you’ll be shown all the credentials for your new site. Take note of the database user/name and password. The credentials can be reset at a later stage if you forget them.
How to make an SSH keypair
I’ll divide this section up in two so it is easier to know where we’re at. The first revolves around being logged into your new site and the second being logged in to your old site.
New site
SSH into your new site and run the command:
ssh-keygenThis will prompt you with some questions. You can read through and answer them as you wish, but here we will just accept everything by pushing enter three times.
This makes a key pair in your ~/.ssh/ directory and we want to copy the output of the public file, ~/.ssh/id_rsa.pub and save that to your clipboard.
Old site
SSH into your old site. Here we’ll make a new file in its .ssh directory with the built-in text editor, nano. The file must be called authorized_keys:
nano ~/.ssh/authorized_keysPaste the public key from your new site into this file (CMD / CTRL + V), hit save (CMD / CTRL + X) and confirm (CMD / CTRL + Y then ENTER)
Credentials and how sitecopy works
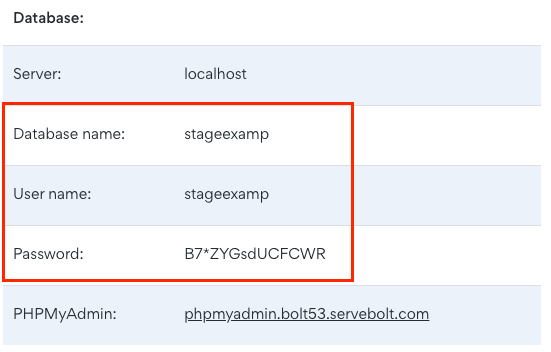
Before we begin with the actual sitecopy script we need a few credentials ready. The four important ones is:
- The CMS we’re using
- SSH login to our old site
- Database name of our new site
- Database password of our new site
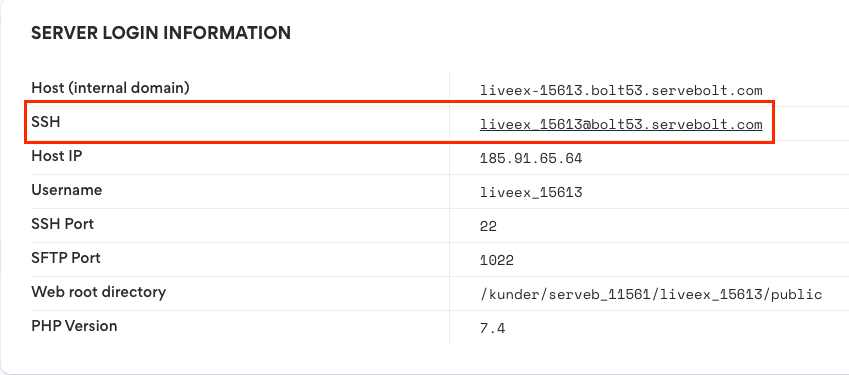


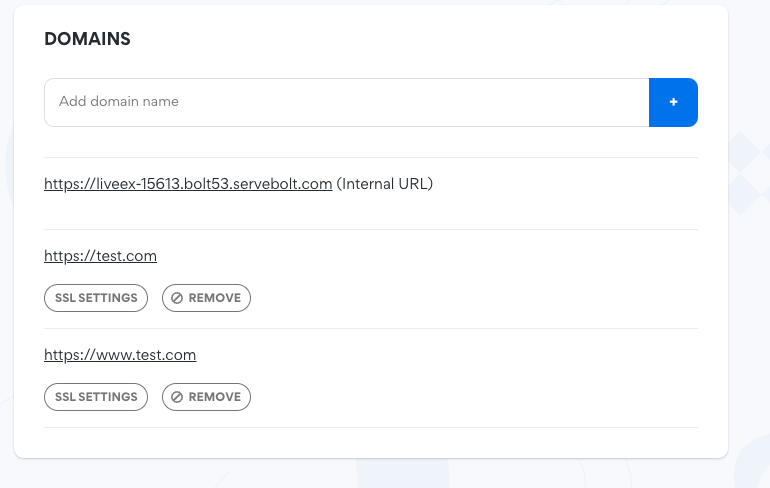
In the images above you will see where to find the SSH login URI, DB Name, and as mentioned before the password you got when making the new site. Fret not if you didn’t save the password. You can follow this guide to regenerate it again.
I haven’t mentioned this before, but we’re using WordPress (wp) CMS in our example here (better late than never). So the four credentials we will use are:
wp[email protected]stageexampB7*ZYGsdUCFCWR
You should also familiarise yourself with how sitecopy is structured:
sitecopy -t [CMS] [OLD_SITE_SSH_LOGIN] [NEW_SITE_DB_NAME]You can also run sitecopy --help to get more information about its options and what they mean.

Running sitecopy
Time needed: 5 minutes
Step-by-step on running the sitecopy script
- SSH into new site
Log into your new site. And initiate the sitecopy command. Based on our credentials this looks like this:
sitecopy -t wp [email protected] stageexamp - Authenticate host
You will be prompted to authenticate the old site (remote host). Type yes and hit enter. If already authenticated from before then skip this step.
You will be asked about your old site’s SSH password if you skipped the SSH keypair step. If so, enter your old site’s password 2 times. - Verify database
Next, you’ll be prompted to verify your database name and user to be sure you added the correct DB credential. It will show what you wrote in brackets
[stageexamp]. If correct just hit enter for both prompts. - Enter database password
Lastly, it will prompt you about your new site’s database password. Paste that in and hit enter and you should see all your files being copied over. Lastly, you should see the database export from your old site and it being imported to the new site.
As in step 2. If you didn’t do the SSH keypair step you will again need to enter your production environment’s SSH password to go through.


Here’s a full walkthrough video of the process. It this example I’ll not be using a SSH keypair, but should you use it just ignore the 4 times I have to enter the old site’s password:
Excluding directory from being site copied (optional)
The best use case for sitecopy is for when you set up a staging or development environment. In that case, you might not want to copy over your media files as that will unnecessarily increase the disk quota. Therefore you can exclude whatever directory or file you want with the -e option. Let’s take our earlier WordPress example in regard to wp-content/uploads:
sitecopy -t wp [email protected] stageexamp -e wp-content/uploads
This makes sure that you copy over everything except wp-content/uploads. But let’s iterate more, as you can still get the media files redirected from your production environment (old site) with .htaccess. Edit your new site’s .htaccess file with nano:
nano ~/public/.htaccessAnd paste this line of code at the bottom of that file:
RedirectMatch 301 /wp-content/uploads/(.*) https://old-site/wp-content/uploads/$1In .htaccess, change out “old-site” with the actual domain. In our example that would be test.com
And as always, should you have any additional questions please don’t hesitate to contact our support chat at servebolt.com!