Table of contents
We offer two different ways to create copies of websites which you can use for staging, testing, or migrations to other Bolts. The first solution is a custom script available on our Servebolt Bolts, the other is a solution within WordPress itself.
Servebolt’s sitecopy script
The main advantage of using our sitecopy script is the speed of the migration as well as the fact that you can use it regardless of the platform you have installed on our Bolts.
Time needed: 15 minutes
Included with our service is a sitecopy script, that allows you to very easily duplicate a website. The sitecopy script makes a full copy of all files for a website and sets up the connection to a new database. It’s a fast and easy solution!
- Add a new site
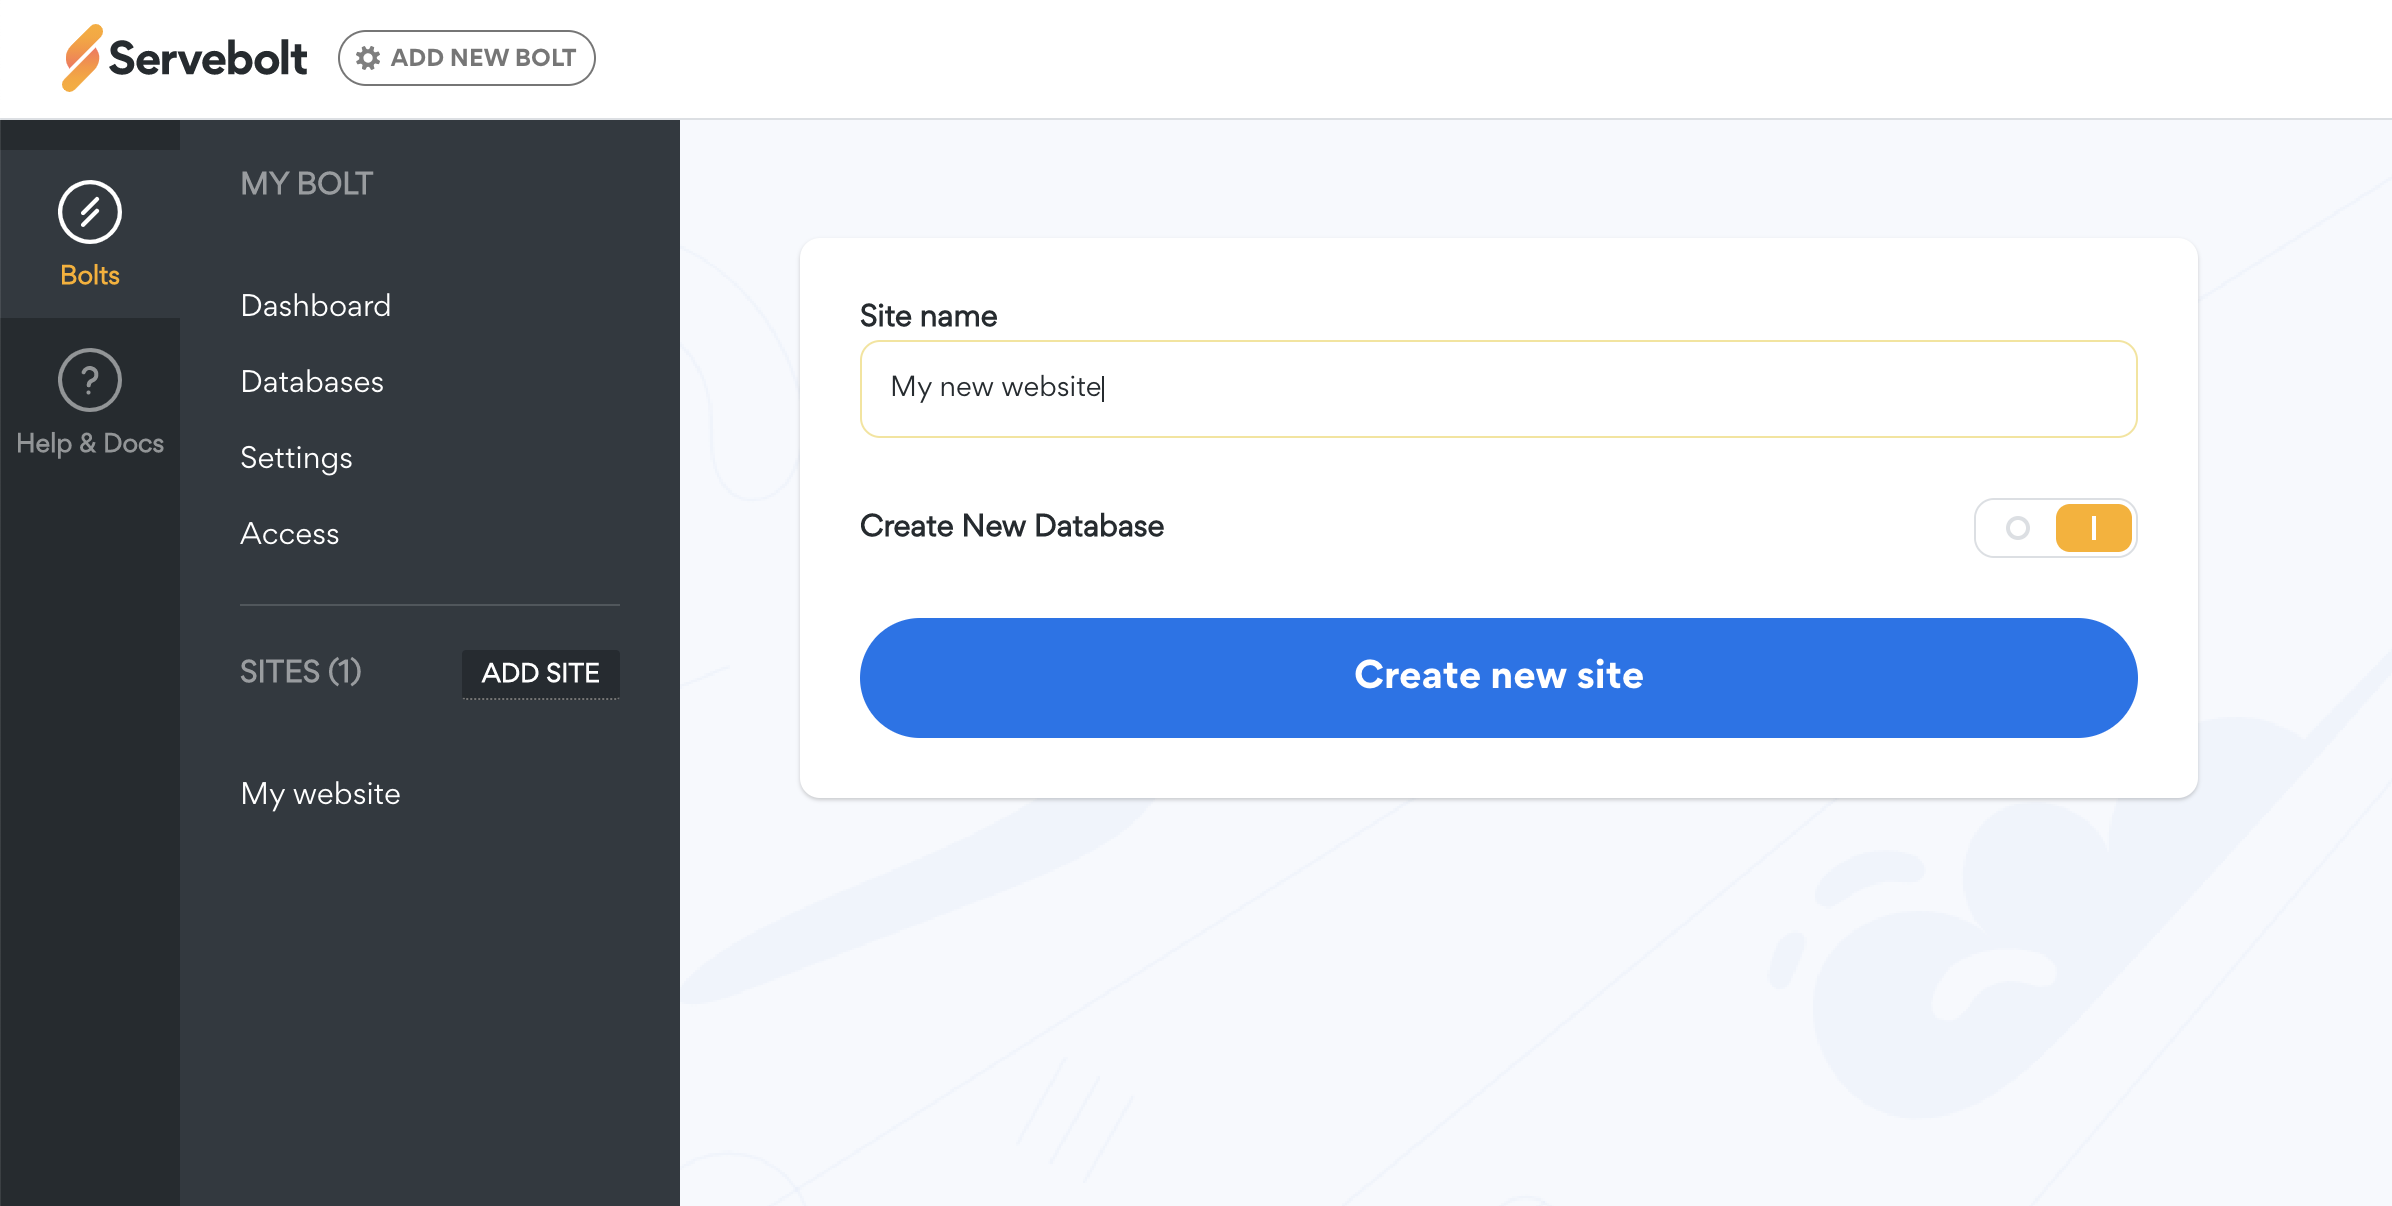
Start by adding an additional website with us. To add a new site in our admin panel, click the “ADD SITE” button. Then select a Site name and click the “Create new site” button. You’ll see a confirmation and receive an email with SSH/SFTP and database information for the new website.
- Login using SSH/terminal
Login by SSH to the new website. Change the directory to ~/public and remove our default index page, like this:
cd public
rm index.php
Now you need to make sure you have the user info for the website that you want to clone FROM. You need the SSH/SFTP username, password, and the server address to clone FROM. You also need the database name, username, and password to clone TO (this is sent to you by email when you set up the new website). - Run the sitecopy script
Run our sitecopy software, like this:
sitecopy -k -t wp user-to-clone-from@server-to-clone-from database-to-clone-to -e wp-content/uploads
First, we set the-k flag. This means that after the first time we enter the SSH password for the site,we’re cloning from, we will not need to enter it again. Secondly, we define the type of website to copy with the-tflag followed bywp, which stands for WordPress. Then we set the user@server to clone FROM. Then we set the database to clone TO. Finally, we exclude copying the folder wp-content/uploads and all its subdirectories with the -e flag.
Excluding thewp-content/uploadsfolder is not a must, but a recommendation. You can do this if you don’t want to store multiple copies of your uploaded files (primarily images). The new website will still work with the images since we’ll rewrite these through.htaccess(in the final step of this guide).
If you want to copy all folders/files, feel free to remove the “-e wp-content/uploads”. Just make sure you have enough storage space for this in your package.
When you run the sitecopy software, you will need to enter the password for the user to clone FROM. You’ll also need to enter the user info for the new database. Other than that, the sitecopy software will manage the whole copying process and database setup for you.
Example sitecopy: Now I am logged in to the site I want to copy another site TO. [email protected] is the site I am copying from, and wordpress9801 is the database of the site I am copying TO. When sitecopy asks for your database name and database user, hit enter because you have already specified that.
- Update the URL
Now you need to correct the address to the new website in the database. This is easily done with WP-CLI using wp search-replace command, like this:
wp search-replace https://website-that-we-cloned-from https://website-that-we-cloned-to --all-tables
The new website address can be found in our Control Panel if you select the website and click the “Domains” tab.
Note: If you have a WordPress network installation (WordPress Multisite), you also need to update the address in the database tableswp_blogsandwp_site, and in the WordPress configuration filewp-config.php(if it’s the main address). - Update .htaccess (optional)
Note that this step only applies if you exclude the
wp-content/uploadsfolder. If that is the case, we need to setup.htaccessto rewrite thewp-content/uploadsfolder (for the images), like this:nano -w .htaccess
Add the following line to use the uploads folder from the production site:RedirectMatch 301 /wp-content/uploads/(.*) https://website-that-we-cloned-from/wp-content/uploads/$1
To close and save the.htaccessfile, clickctrl+x, selecty(to save), and press theEnter key.
Now you can visit the new website that you’ve set up, which will be an exact copy of your real/production website. If your WordPress site is a multisite, then follow the steps below.
WordPress multisite (only required for WordPress multisites)
If your WordPress installation is a multisite, then do the five steps above and follow these extra steps:
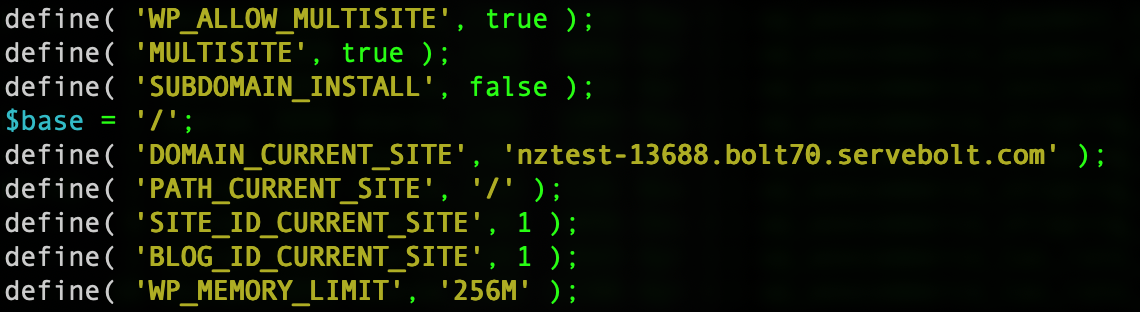
Changing URL in wp-config.php
Check the multisite-related code in wp-config.php and update DOMAIN_CURRENT_SITE to our internal domain:
Changing the .htaccess file
Apache web servers use a .htaccess file for configuration. A .htaccess file comes with directives and settings for websites and folders. It is therefore important to update the .htaccess file accordingly with the correct rules depending if your site is a subdomain or subfolder multisite. Correct rules can be found in the official WordPress documentation.
Adding extra internal domains (only required for subdomain multisites)
If your WordPress installation is a subdomain multisite, then you’ll need to make more internal domains which correlates to the number of subdomains the site has. See our article on adding more internal domains.
When the extra subdomains have been added as internal URLs, then a search-replace is needed before continuing to the next and final step. See step 4 above.
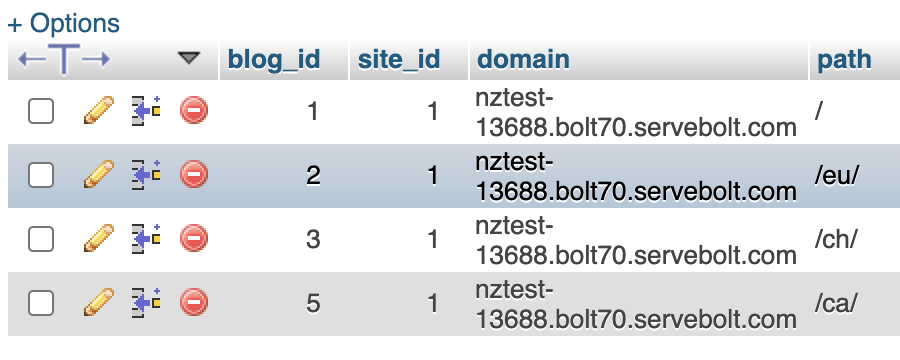
Updating URLs in the database
Some URLs must be updated manually in the database under the tables wp_blogs and wp_site. The domain section with our internal domain will need to be changed accordingly, leave the path as is.
If you fail to follow any of these multisite steps, then you will be presented with an Error establishing a database connection, if you don’t, then you have succeeded. Should you have any questions relating to this process, then don’t hesitate to reach out to Servebolt Support.
Other options
Alternatively, you can also use a plugin to create a duplicate for staging or test purposes. Check out our article on how to duplicate a site with the Duplicator plugin in WordPress.